Menu
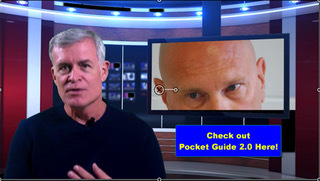
In this special episode, Tom gives you lots of tips and tricks to make spectacular videos at home, ranging from the minimalist approach to very elaborate and everything in between. As usual, Tom holds nothing back, so make sure to check the show notes for links and pictures of other peoples' studios.
Subscribe at:
![]()
![]()
NOTE: Complete transcript available at the bottom of the page.
Screw The Commute Podcast Show Notes Episode 199
How To Automate Your Business – https://screwthecommute.com/automatefree/
![]()
Internet Marketing Training Center – https://imtcva.org/
Higher Education Webinar – https://screwthecommute.com/webinars
[03:37] Tom's introduction to In Home Video Studio [06:36] NO NO for bright lights and other no nos [09:51] Doing a green screen correctly [11:19] Bookcases and pop up banners [12:43] Finding a used retail equipment store [13:58] Using flowers, white boards and monitors [14:51] Standing or sitting and adjusting the lights and cameras [18:28] Sponsor message [19:37] Video lighting [23:31] Getting the best sound [24:37] Camera positionsHigher Education Webinar – https://screwthecommute.com/webinars
Screw The Commute – https://screwthecommute.com/

Screw The Commute Podcast App – https://screwthecommute.com/app/
Know a young person for our Youth Episode Series? Send an email to Tom! – orders@antion.com
Have a Roku box? Find Tom's Public Speaking Channel there! – https://channelstore.roku.com/details/267358/the-public-speaking-channel
How To Automate Your Business – https://screwthecommute.com/automatefree/
Internet Marketing Retreat and Joint Venture Program – https://greatinternetmarketingtraining.com/
Lighting with cookies with Tom – https://www.youtube.com/watch?v=C4ybsqBrDaw
See video home studio pictures here – https://screwthecommute.com/199
Video Weekend – https://screwthecommute.com/videoweekend
Internet Marketing Training Center – https://imtcva.org/
Rob Garcia – https://screwthecommute.com/198/
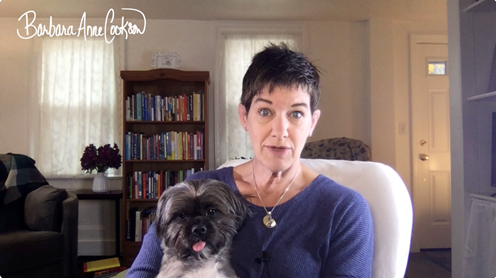
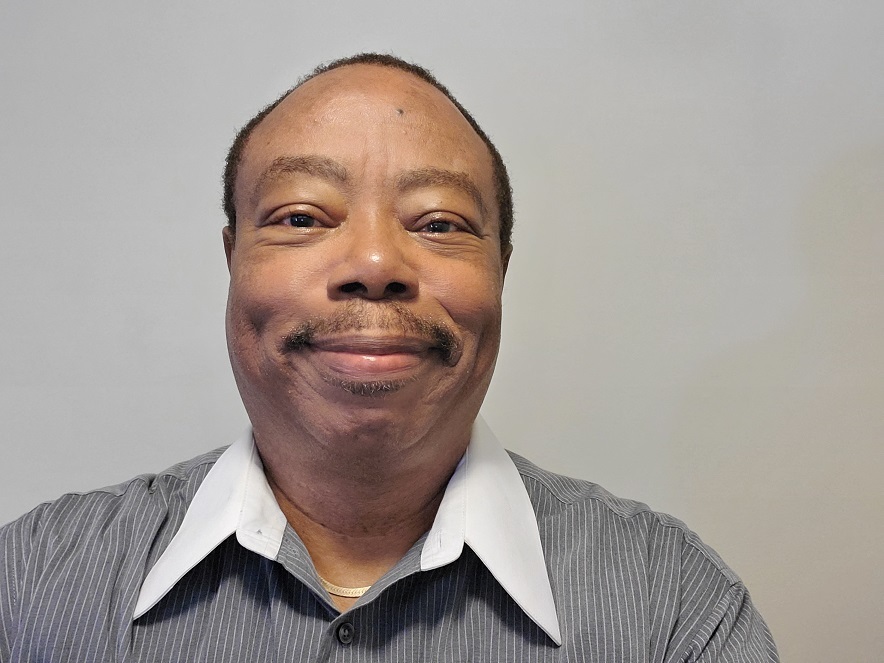
BARBARA COOKSON
Barbara's website: https://www.barbaracookson.com/
This setup works great for Facebook Live, and pretty much anything I need to do on the fly. Could also do webinars or training videos as well. Since I moved to a tiny apartment, and am limited for space, this is what I've got for now. Easy peasy. And I'm liking ECamm live for the software. I used an external lavalier for the mic, it's a Vidpro Pro. Works slick with the Macbook Pro.
BRIAN KELLY
Website: http://ryp.im/cbm-comingsoon
Brian's advanced recording studio. VERY COOL SETUP!
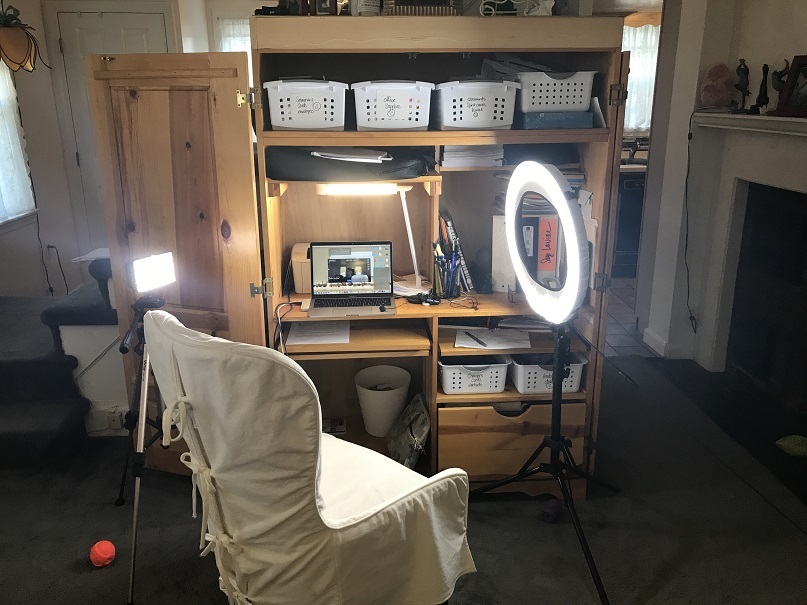
DON STURGILL
Don's website: https://www.DonSturgill.com
Here's the list:
Canon Vixia R700 camera with tripod
Logitech C920 webcam
Blue microphone with windscreen
Zoom H1n hand microphone
StudioPro softbox lights x2
Chromakey backdrop blue/green screen
Ottlite shadow light
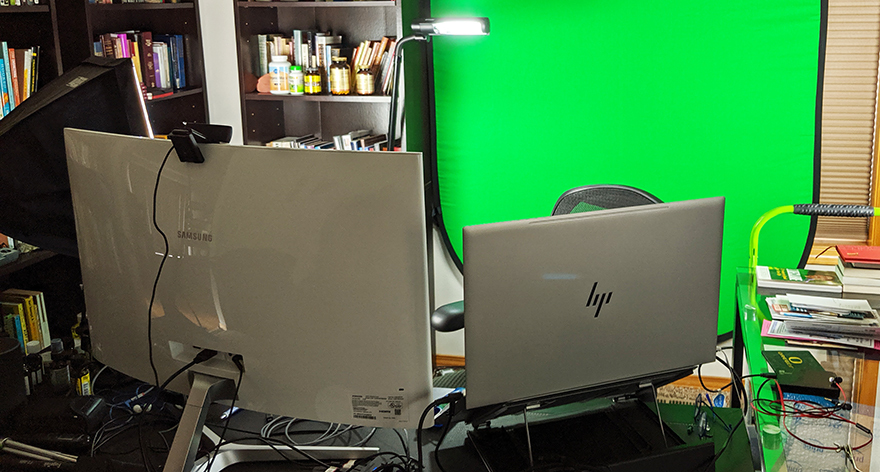
I'm using an HP Envy with a Samsung second screen. Recording software is Camtasia. My wishlist: learn how to use it all 🙂
Don's basic equipment video
Tom's Comment:
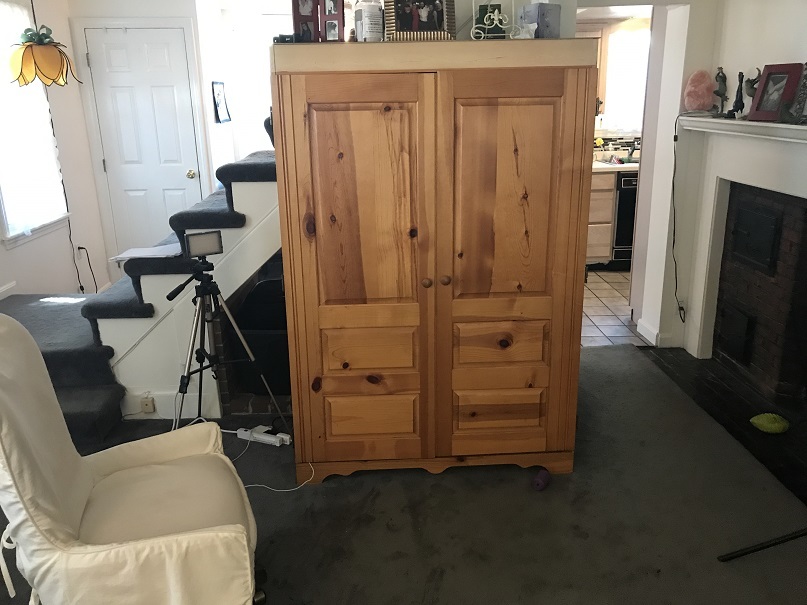
Here's a simple studio Don Sturgill is working on right from his desk. He's probably not going to go with the green screen.

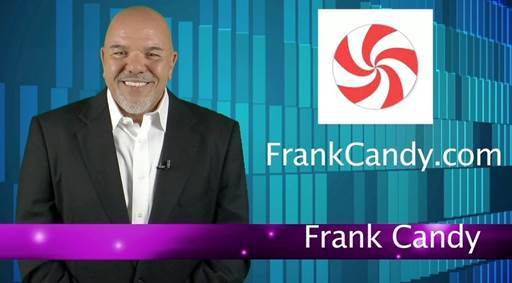
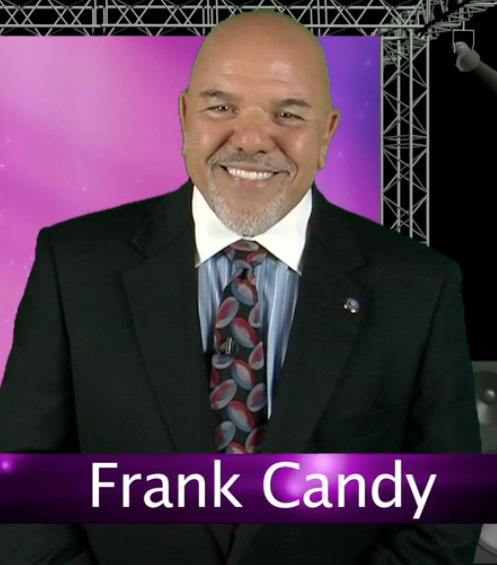
FRANK CANDY
Frank's website: http://www.frankcandy.com/

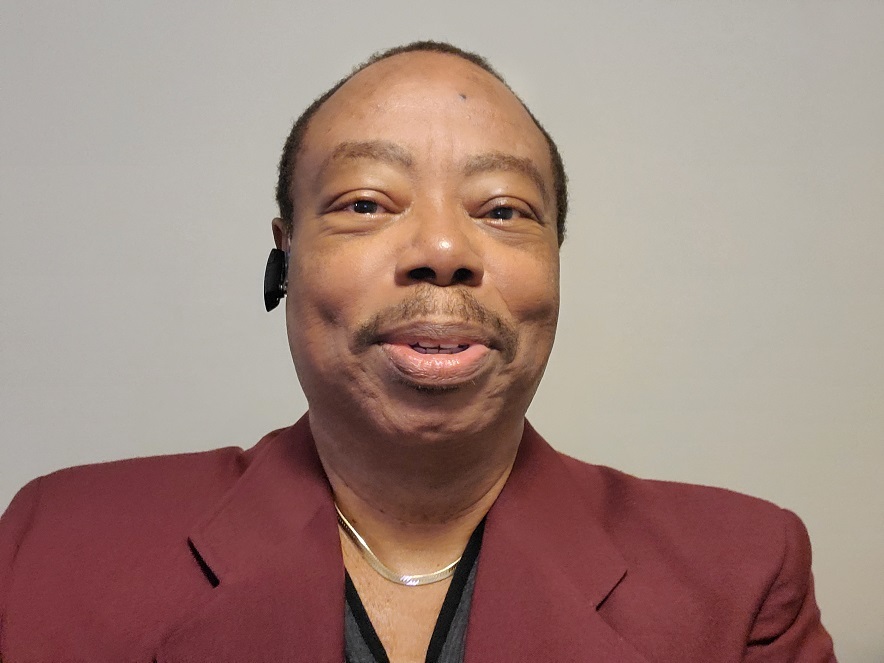
GREG WILLIAMS
Greg's website: https://www.themasternegotiator.com/

JEFF ROSE
Jeff's website: https://www.goodfinancialcents.com/
Image on home page is a good example of taking a shot in a home studio.
Videos in various setups: https://www.youtube.com/wealthhacker
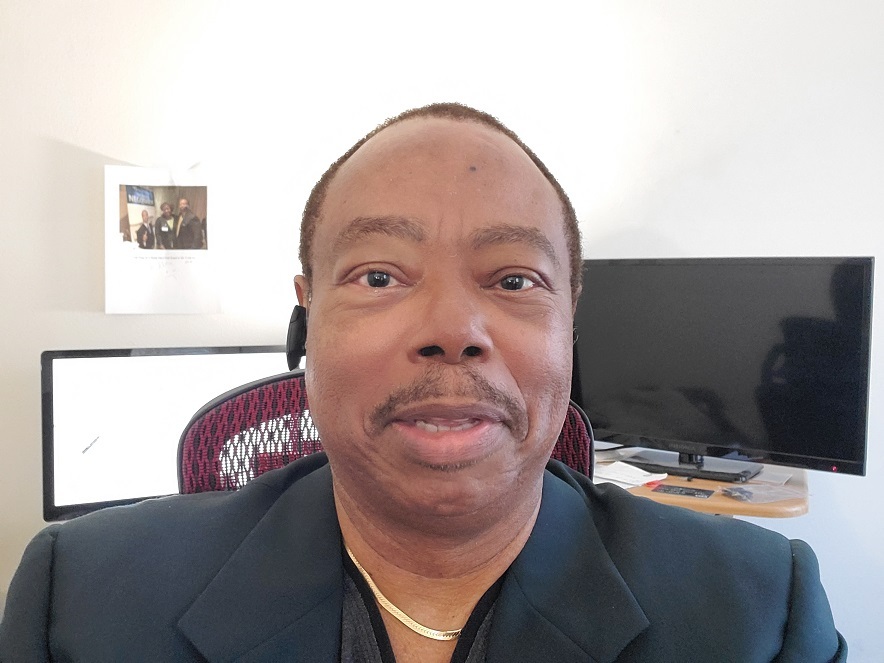
DR. ROB GARCIA
Rob's website: http://www.yournextlevelofsuccess.com/
Hat from Southpaw Laser Concepts with J.D. Tierney, wood etching from Other Worldly Wonders, SHIFT magazine cover, dragon picture and light up city painting from Dollar Store.
ROB HOERNTLEIN
Websites:
https://www.facebook.com/ConnectTrend/
http://connecttrends.com/
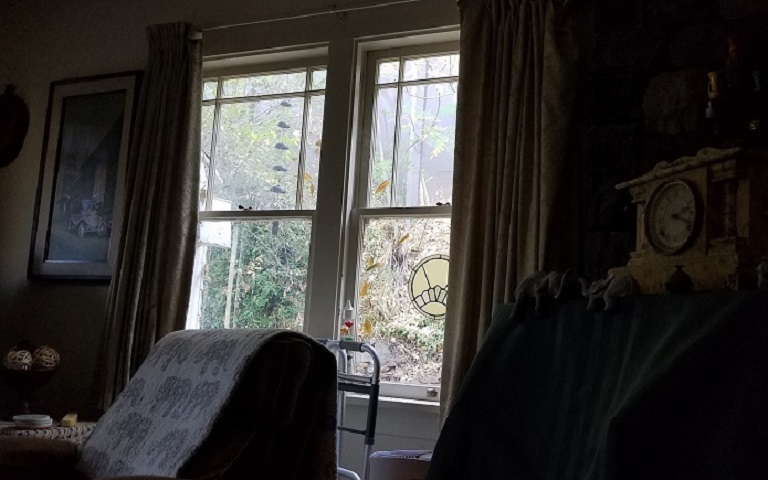
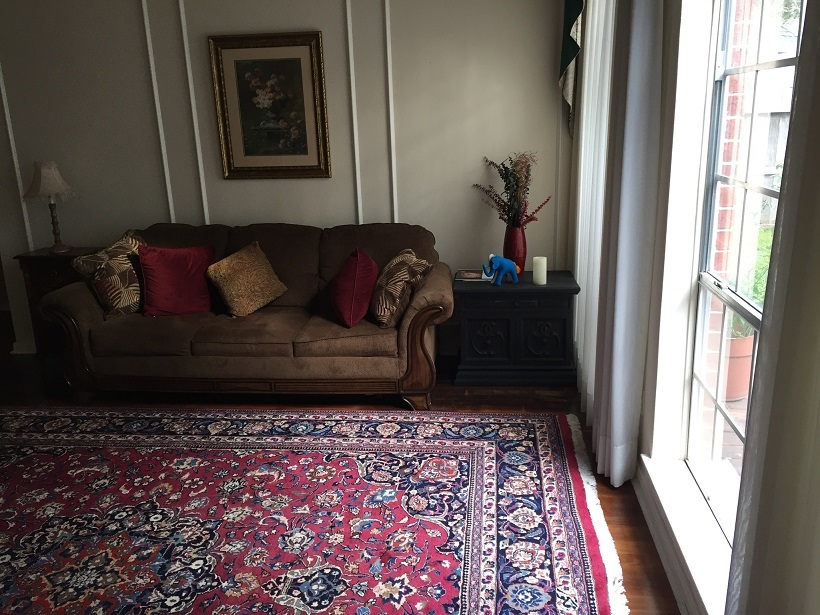
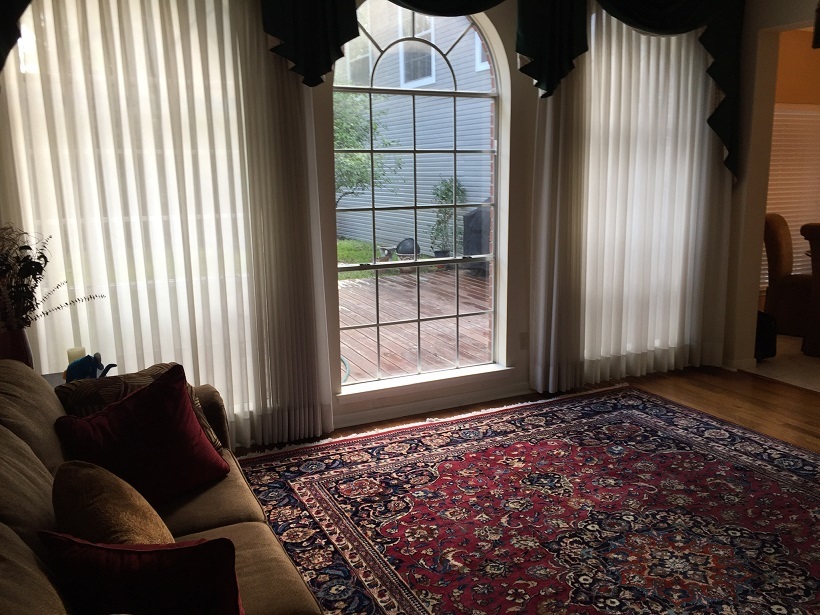
I don't use any professional lights; don't have the room for anything like that. I gave my office to my wife to use as a craft room when she moved in. I want to make my home feel like her home, our home, and that seemed to be a good way to make that happen. I have to say that she has used it well. I miss my office, but love my wife. The first photo is when I was trying to get a good spot in the dining room. The background was awful and I couldn't get the lighting right. The 4th photo is looking at the lighting in a corner of the living room. Photos 2 and 3 are trying different camera angles to get the background right plus different lighting combinations. I found that having a lamp to my right in front of me. The dining room light, also to my right but to my side with the drapes open on my left worked best. I actually like a different corner of the living room better because of background, but there is a window right behind where I would sit and I couldn't get the lighting right. That is photo 5. There is not a good place by my bookshelves. Because I am in such a wonderful, beautiful place known for its natural beauty, I love shooting outside in nature best. Considering lighting, ambient noise and background it can be difficult but doable.
STAN WALTERS
Stan's videos: https://www.youtube.com/user/TheLieGuy
I use an Apple computer. I use Camtasia Software. Really easy for me to use. I used to do videos out on the road wherever I was teaching. Created unique “looks”. Then I got the idea of 101 Tips for Interviewing and Interrogation. For about 105 weeks (had a couple technical issues) I sent out a new video every Tuesday AM. Gonna do an On-line Academy with same system. Set up studio in my basement. Used the “pie pan” lights you can get at the hardware store. About $7 each. Used “daylight” CFL bulbs. Had to get rid of my “red face.” Used a Kodak Playtouch Camera. Shoots 1080p video. Bought refurbished camera for $50 on Amazon. Hung green screen from the ceiling. Two pie pans in front of me. One behind me on the floor to defeat the shadow. One pie pan high and to my right to light back of my head. One pie pan high and to my left to light my face. I would do that different now. I’d cut the light on my face. Bought set of “virtual studios” scenes for about $35. I wanted a “newsroom” look to my videos. I also liked be able to drop in images and text in the “voids”. With free screen I can create ANY background I want. Even classic office or “bookcase” look. I’ve made 145+ videos using this system. I have moved to Florida and downsized from 4500 square feet to 2500. I have bought a 7′ X 6’ roll down sunshade like you use on your patio or porch. (Sam’s Club for $65). Gonna use safety pins to hold green screen to the shade. It will be mounted to the ceiling of my small office. I’ll be able to “roll down” the green screen, shoot my video and then roll it back up to clear my office space. Gonna shoot my “academy” video using this setup.
STEVEN KUHN
Steven's website: https://steven-kuhn.com/
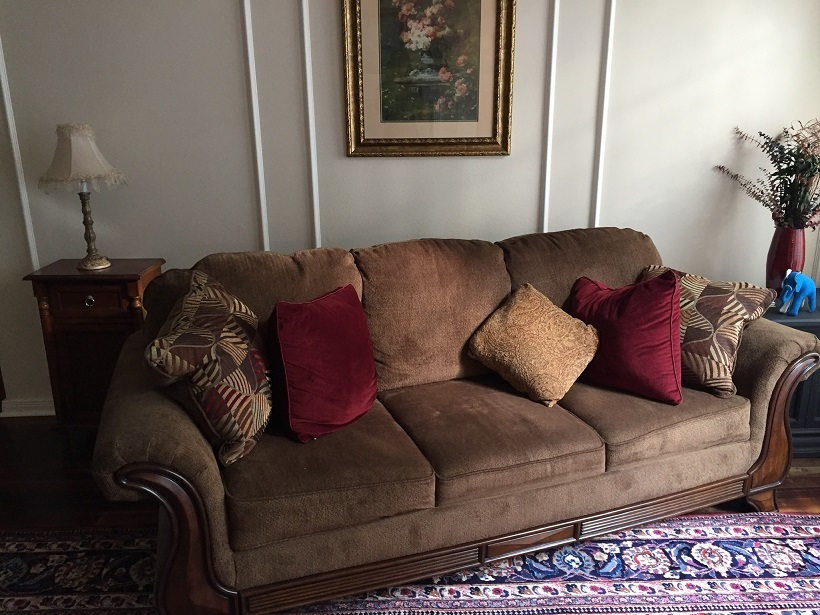
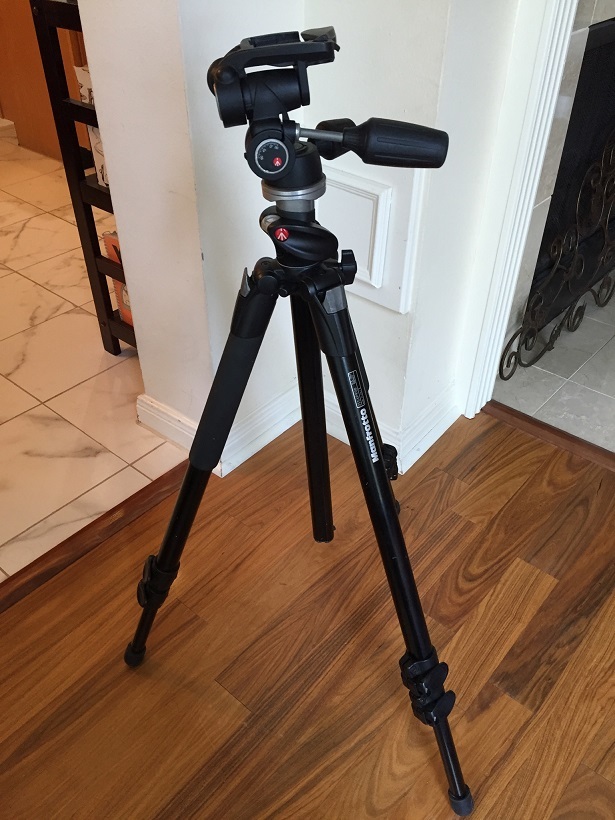
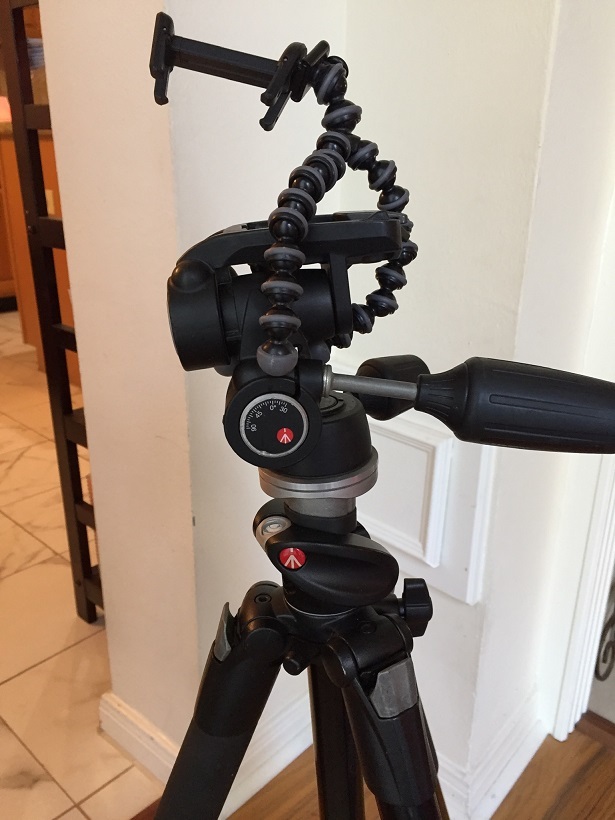
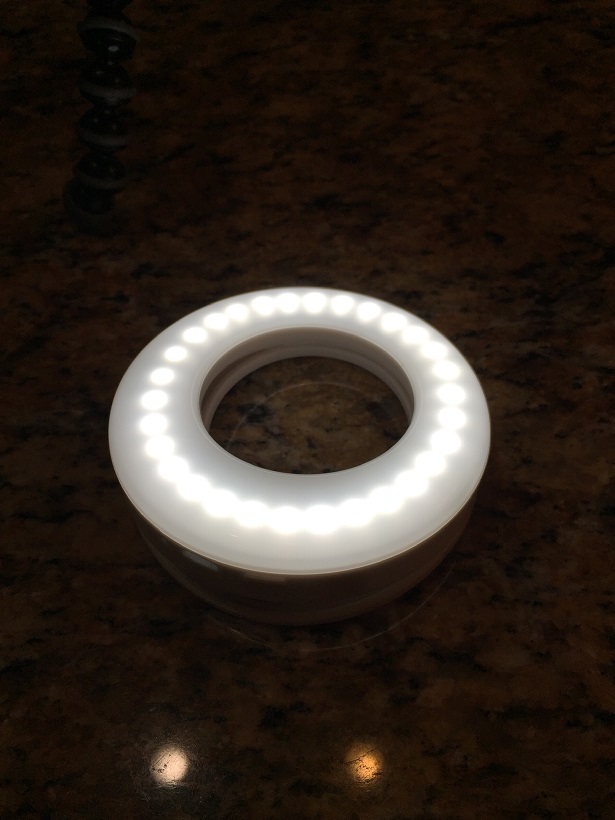
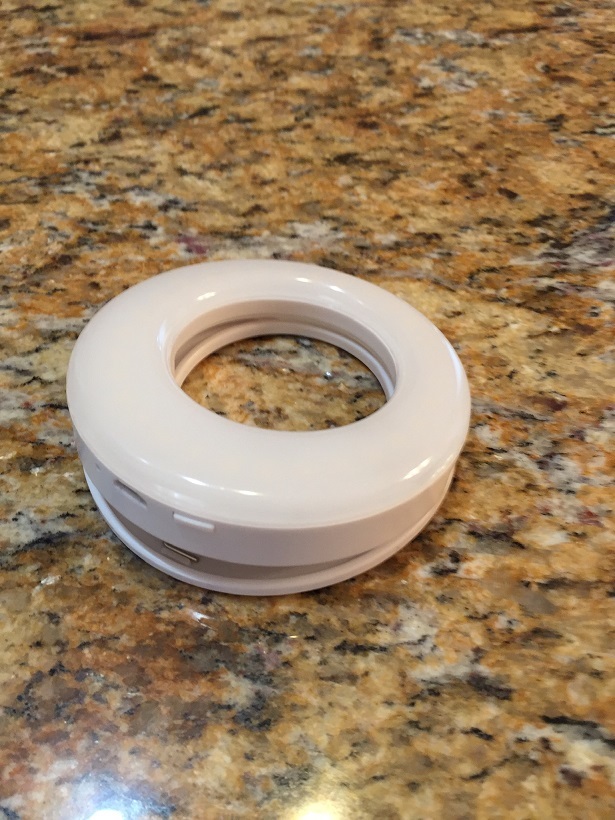
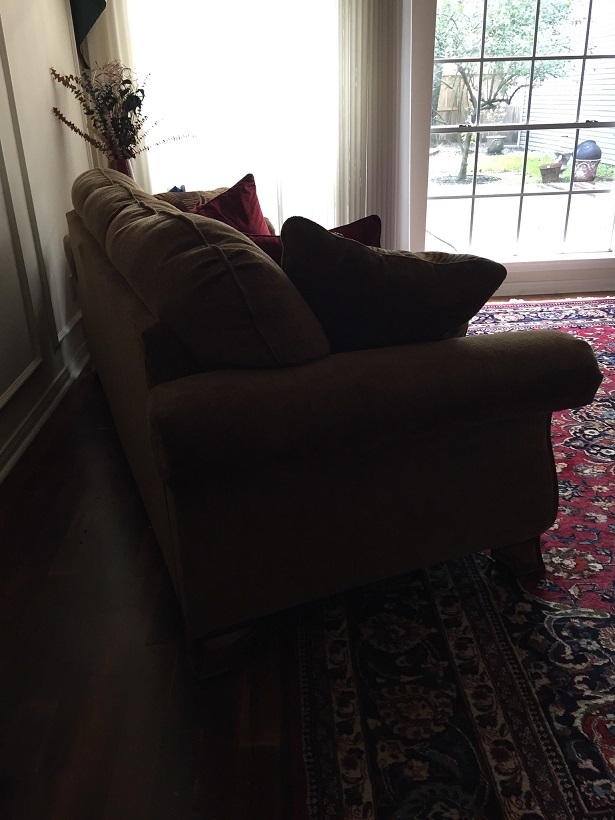
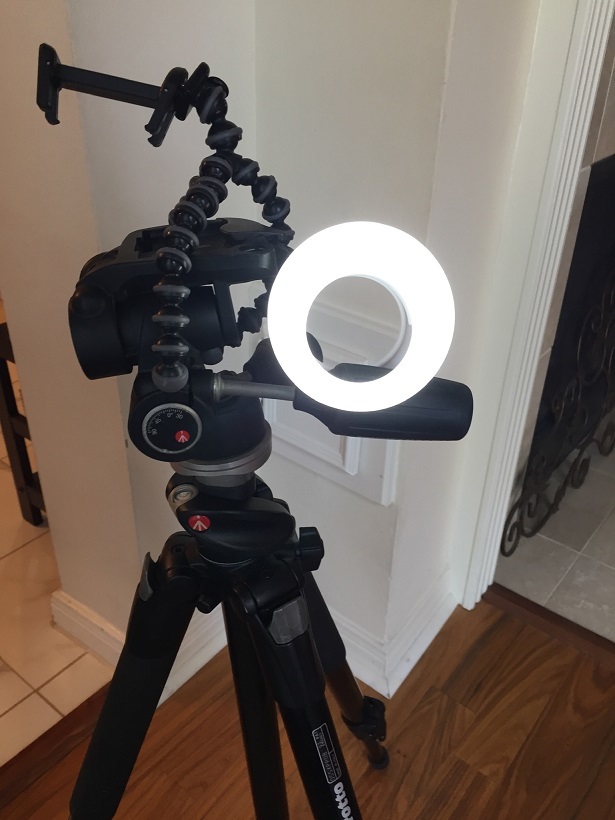
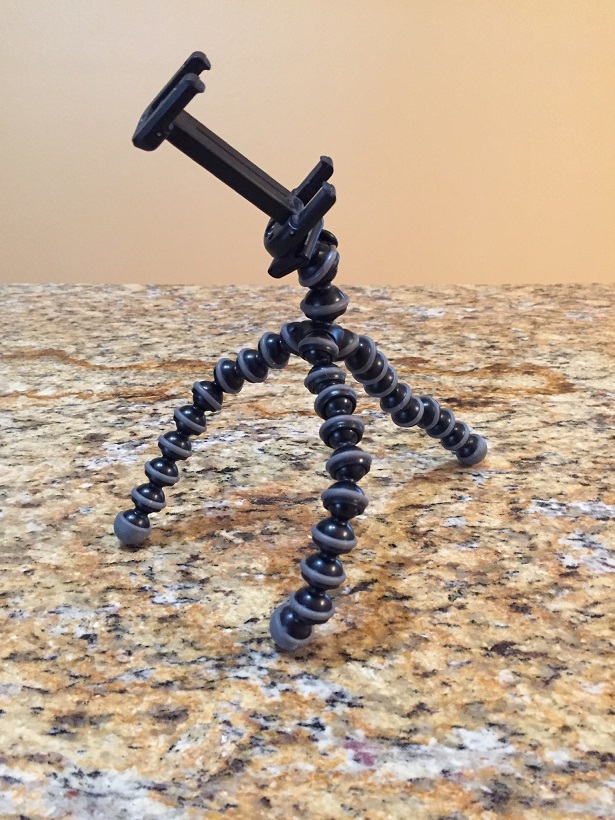
These photos were taken this morning in my living room. I usually sit on the couch with the painting behind me. I pull the couch out from the wall (angled towards the window). I use the camera tripod with the octopus holder for my iPhone. I face the big windows and try to shoot when I have good daylight. However, if I need more light on my face, I clip on the light ring that I got on Amazon for about $12. Also have a lavalier mic to attach to my phone that I clip on my shirt near my mouth. Don't usually use my computer/desk because right now it's in my kitchen and the background is my refrigerator. Working on converting a bedroom to a real office, at which time I plan to shoot more video using my computer. Also have a light kit with reflectors but haven't used it yet for the few short videos I've done to date.
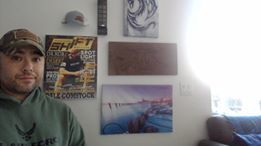
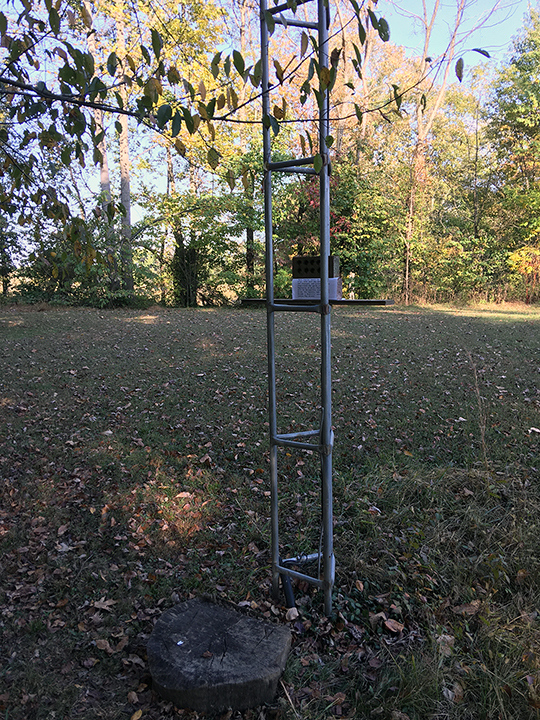
TIM MAUDLIN
Website: http://dowhatyoucannow.com/
Instagram: https://www.instagram.com/timmaudlin/
IGTV: https://www.instagram.com/timmaudlin/channel/
Facebook group: https://www.facebook.com/groups/DoWhatYouCanNow/
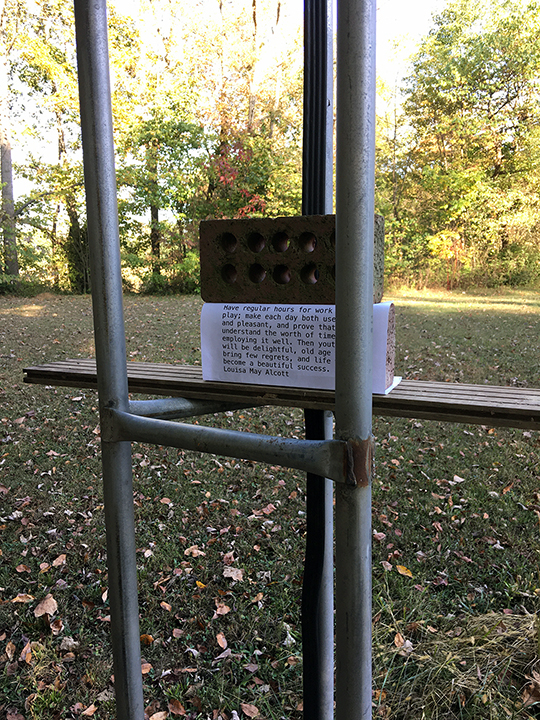
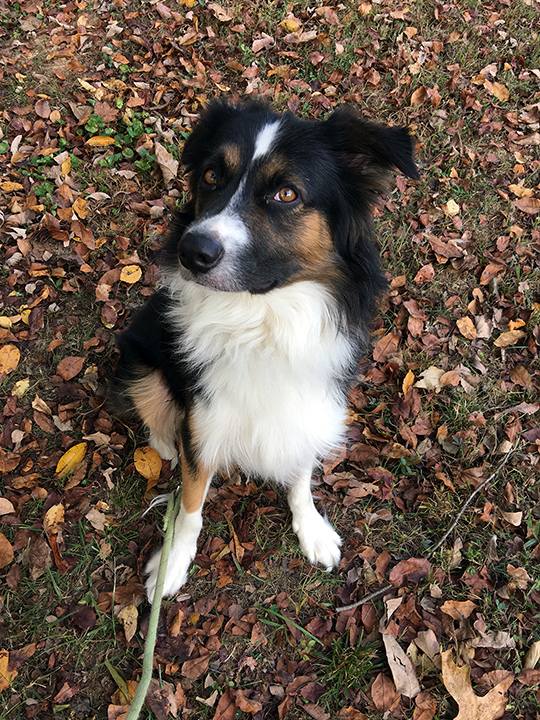
Pics from my outdoor studio. I have been recording videos when I walk my dogs. I use an old TV antenna tower. There is a board across the structure that serves as a platform. I use this as either a stand for my phone or a notes holder. A couple of bricks help hold my notes in place or serve as a backstop for my phone. There is a log on the ground that I stand on when I look into the camera. The view from the tower shows my background when I’m on screen. When I walk one of my dogs, I will point the camera at them while I refer to my notes. Then we finish the video walking. Lighting is natural. It’s nothing fancy but it works for me.
WENDY BOUCHOUX
Tom's comment:
This disabled person shot powerful selfie videos right from her wheelchair.
Wendy's videos: http://publicspeakingspace.ning.com/video/video/listForContributor?screenName=24xky5oxy5ac2
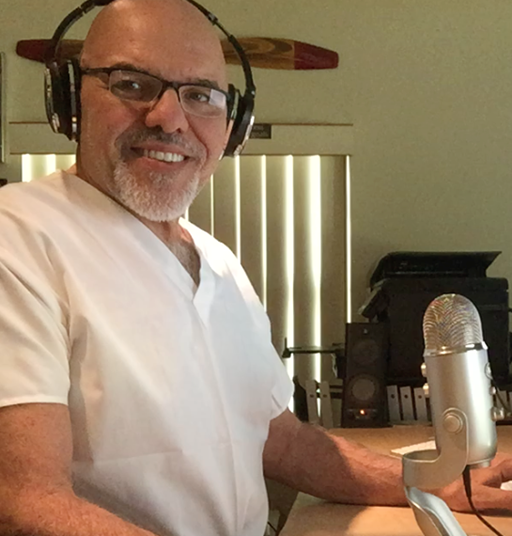
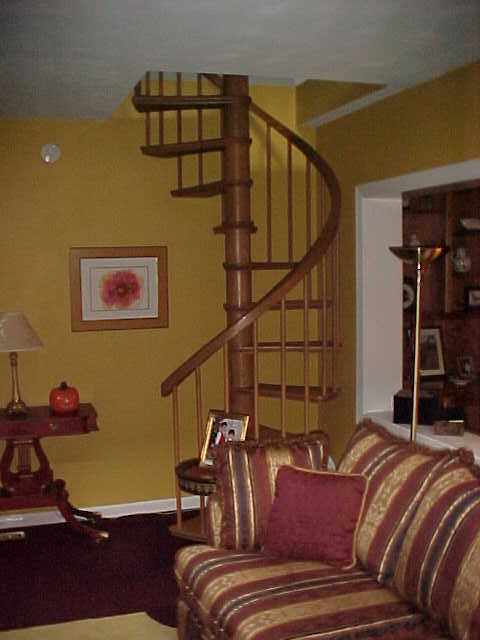
TOM ANTION
Tom's website: https://www.antion.com/
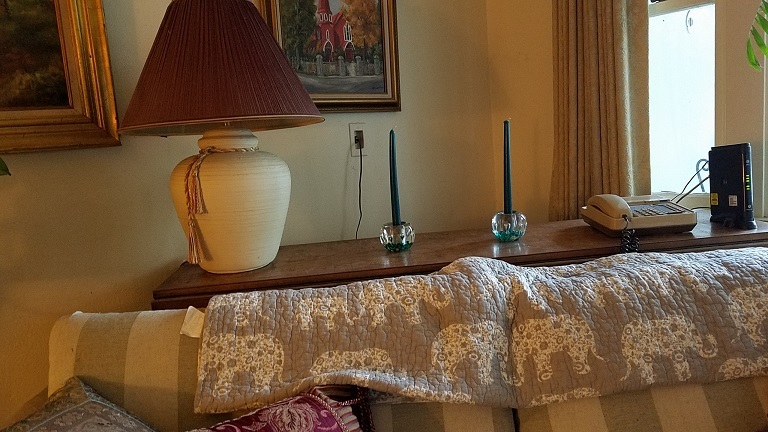
Tom frequently uses his spiral staircase as a backdrop for his videos when shooting in one of the living rooms.
Notice how Tom put together various elements to create a nice looking set.
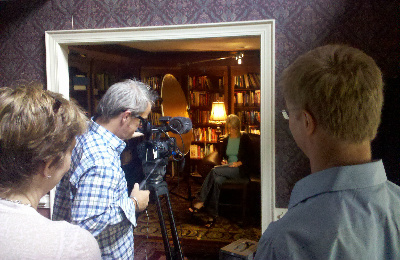
In this case, we moved the camera back into the foyer of the house because the room was too small to get a good shot if the camera was too close. To use a super small area, you may have to get a DSLR with interchangeable lens or put a wide angle lens on your cell phone.
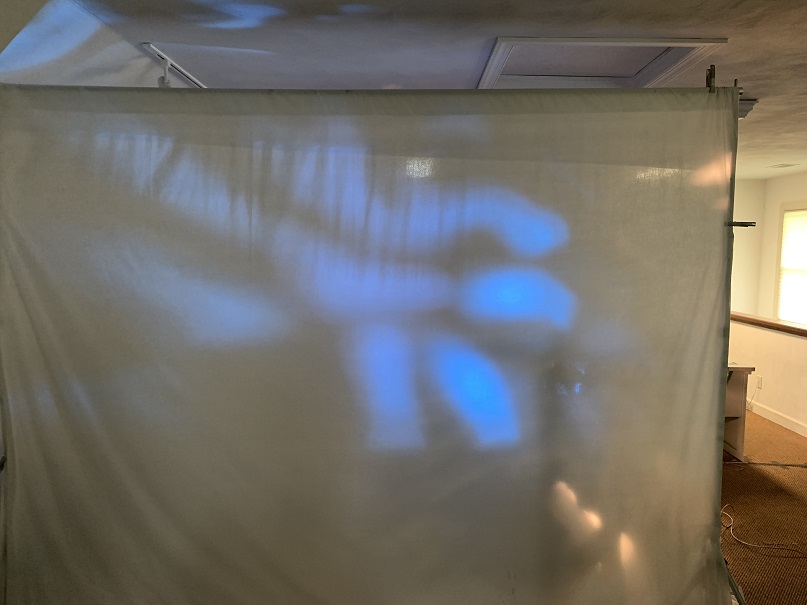
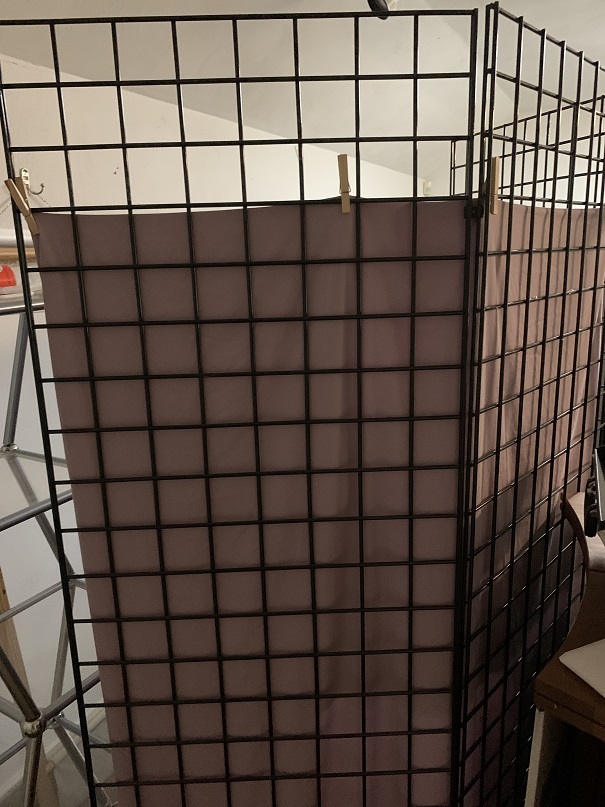
This is the translucent muslin backdrop with stands to hold it up. Note the bag of white gravel on the bottom of the stand to keep it stable.
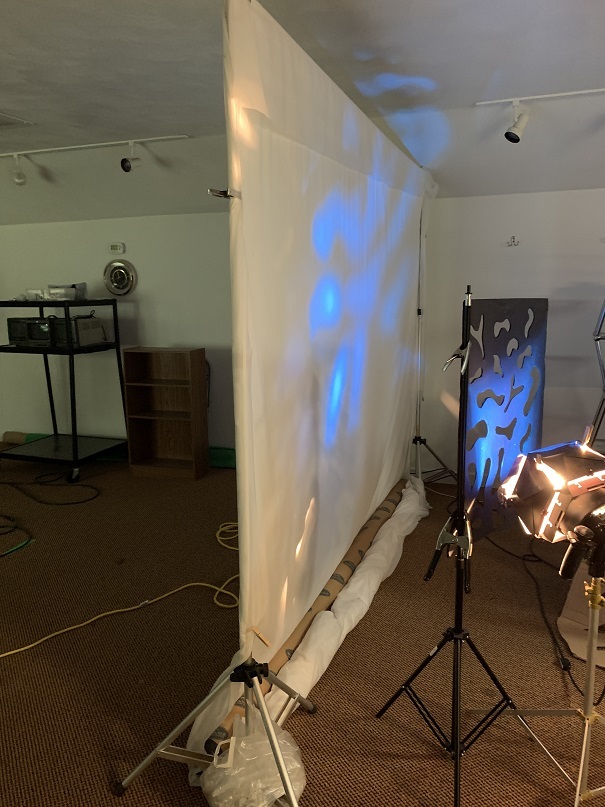
Cookie with light shining through with a blue gel on the back of the muslin backdrop. Note: If you were doing this on a wall, you could put the light and cookie on the front side of the wall near the floor so the camera would only see the blue light on the muslin.
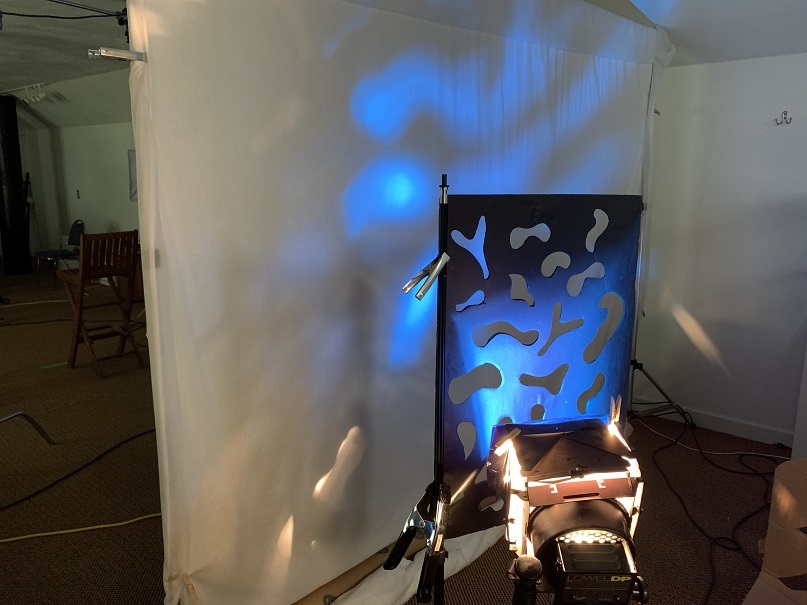
Front side of translucent muslin with blue gelled cookie shining through from the backside. Note: Camera would only see the blue light with you sitting in front of it.
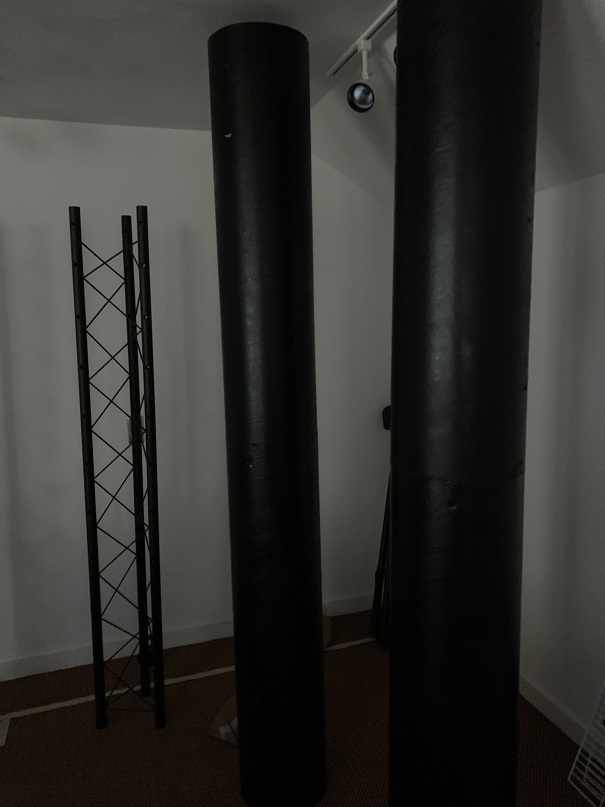
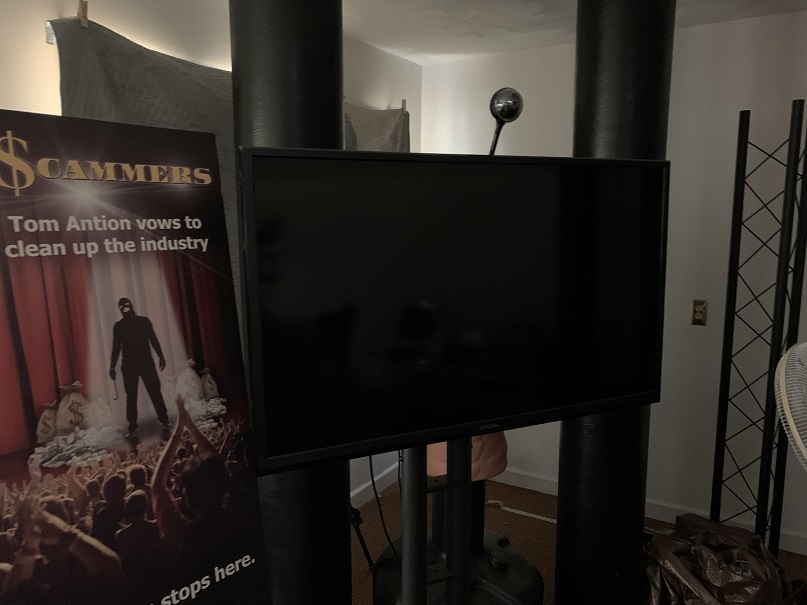
Cylindrical pillars were uses as part of the background and made from concrete pillar forms from Home Depot that were painted black. Metal lighting truss was positioned vertically rather than mounted horizontally in the ceiling.
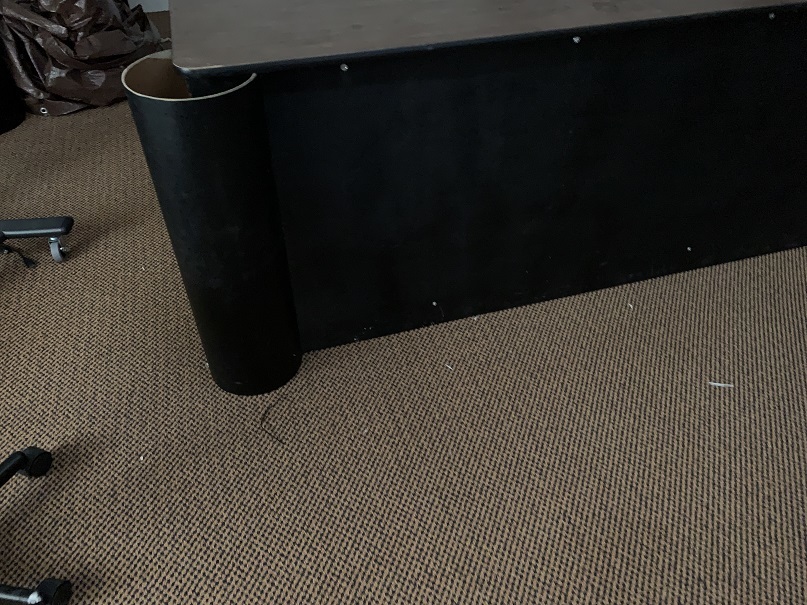
Front of banquet table was covered with thin plywood and corners were concrete forms painted black.
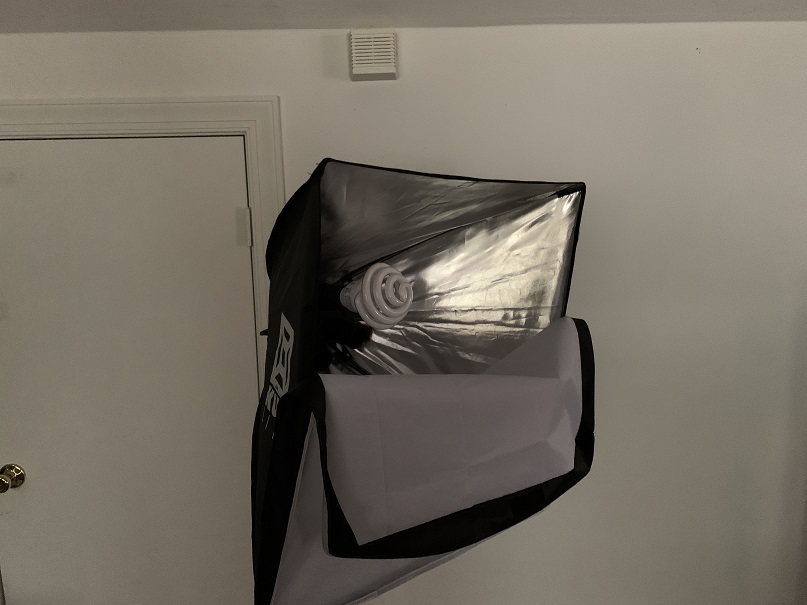
Light box with diffusing cloth on front.
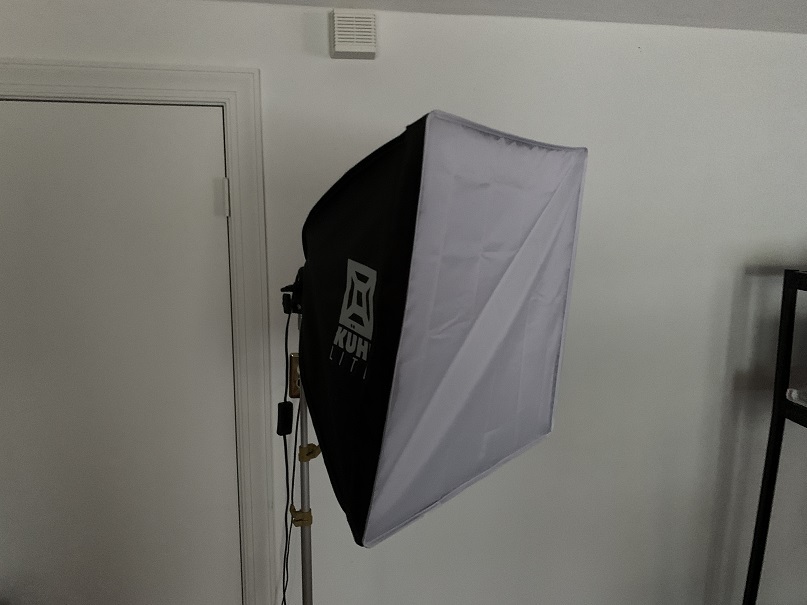
Light box with diffuser removed to reveal bulb.
Stand up TV Monitor
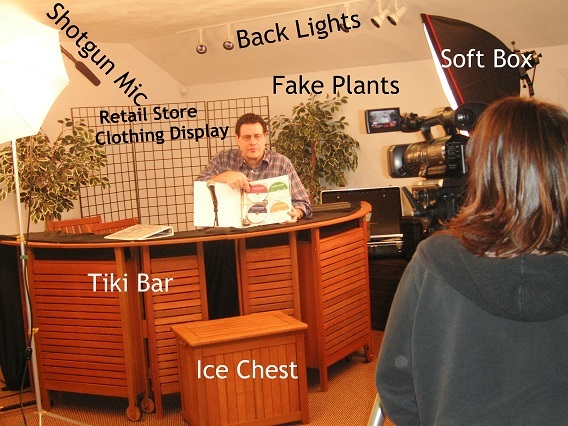
Purchased this retail metal clothing rack/screen for $5.00 from a used retail fixture store.
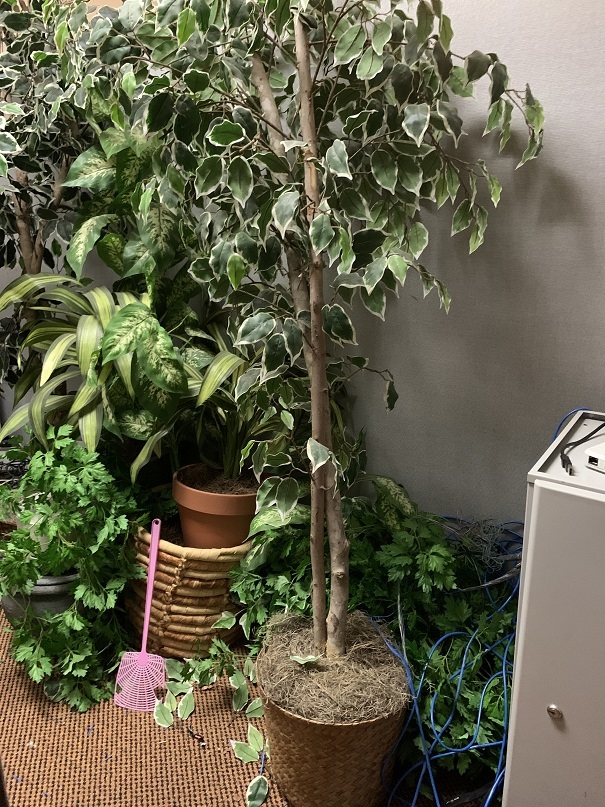
We have a variety of plastic plants when we want to look especially tacky LOL
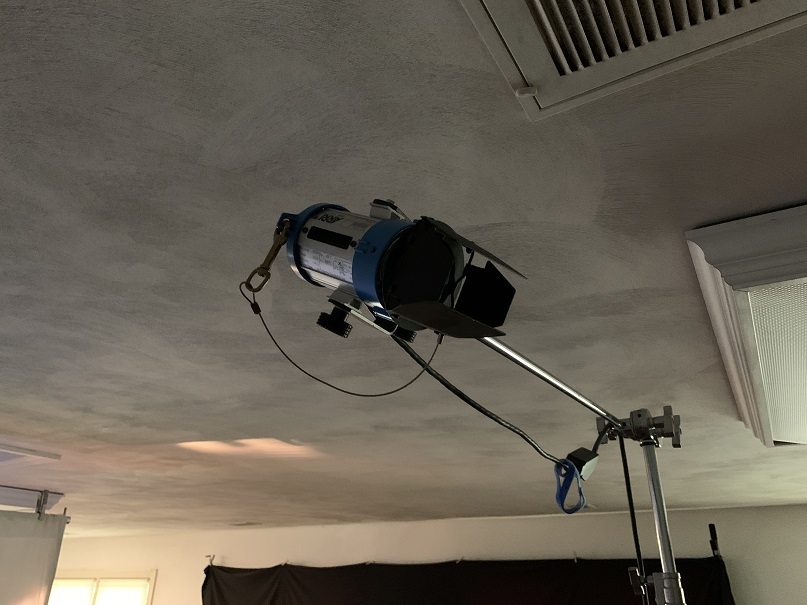
A smaller backlight can make you stand apart from your background.
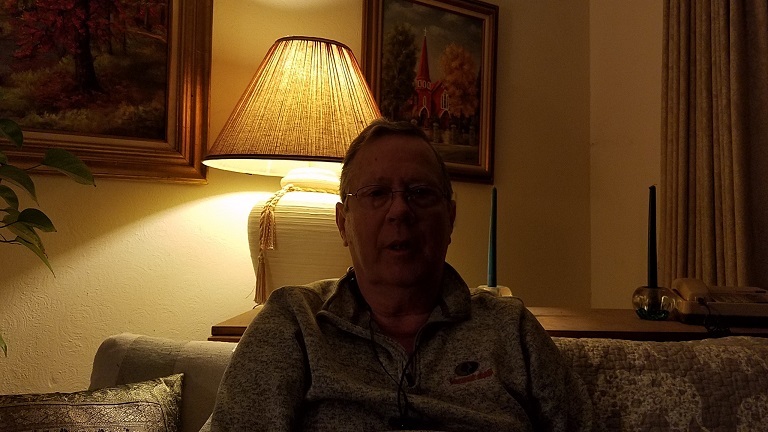
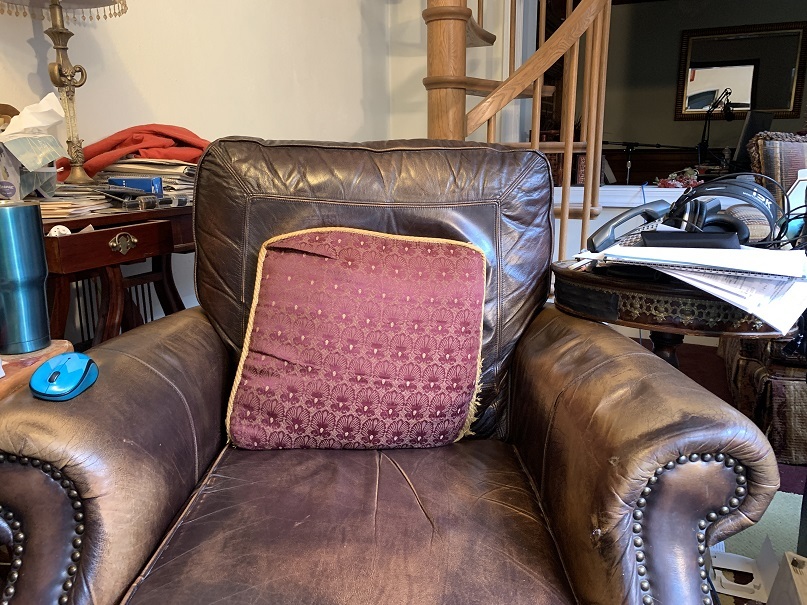
Tom's easy chair in one of his living rooms. Note pillow in lower back region to force him to sit up and lean forward.
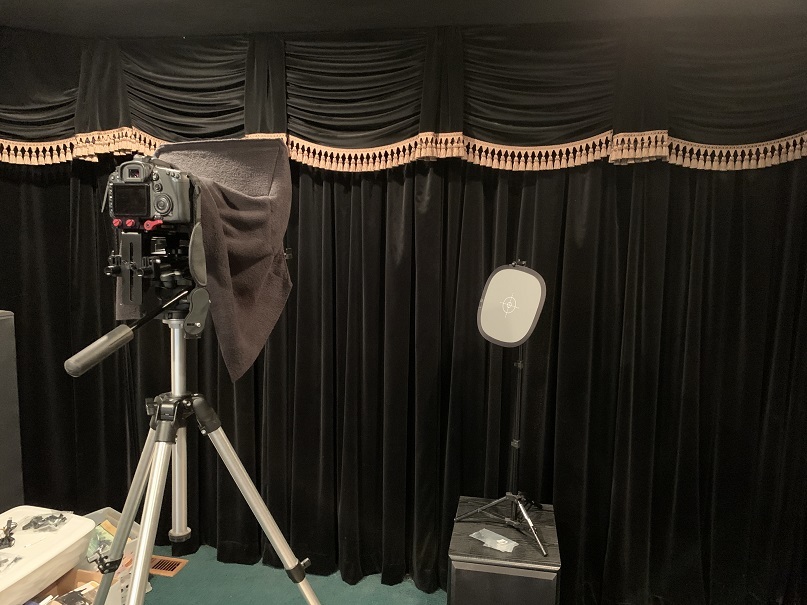
Small setup in Tom's theater. Note the focusing disc Tom used when working buy himself. He puts the disc where his head will be and focuses on it. Then he steps in and he's in focus.
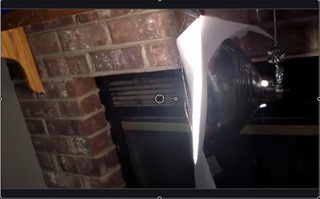
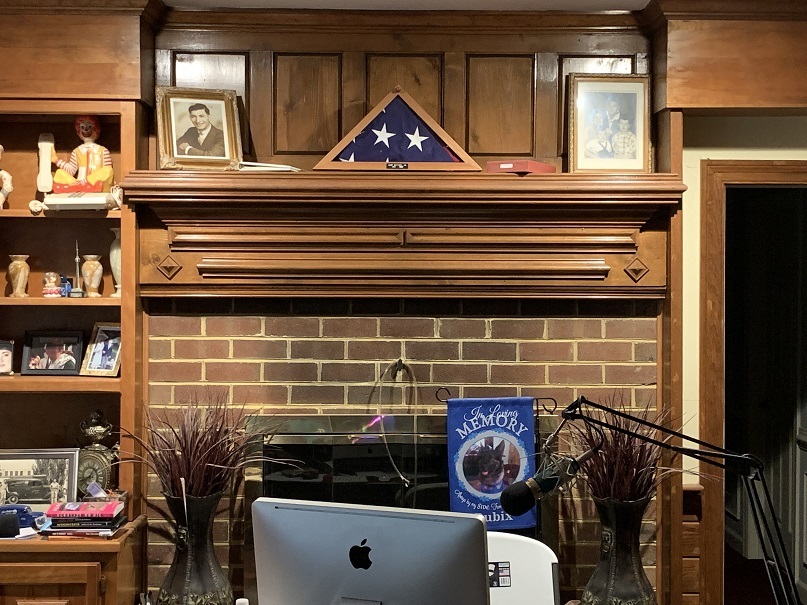
Natural backdrop in front of the fireplace.
I discovered a great new headline / subject line / subheading generator that will actually analyze which headlines and subject lines are best for your market. I negotiated a deal with the developer of this revolutionary and inexpensive software. Oh, and it's good on Mac and PC. Go here: http://jvz1.com/c/41743/183906
The WordPress Ecourse. Learn how to Make World Class Websites for $20 or less. https://www.GreatInternetMarketing.com/wordpressecourse

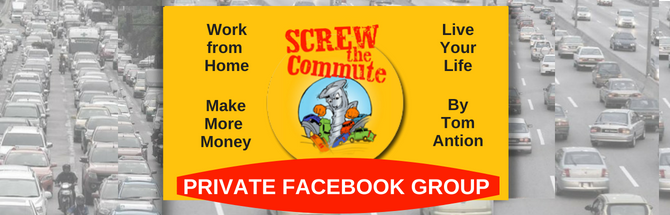
Join our Private Facebook Group! One week trial for only a buck and then $37 a month, or save a ton with one payment of $297 for a year. Click the image to see all the details and sign up or go to https://www.greatinternetmarketing.com/screwthecommute/
After you sign up, check your email for instructions on getting in the group.
![]()
![]()
Want The Transcript for this episode?
Episode 199 – In Home Video Studio
[00:00:09] Welcome to Screw the Commute. The entrepreneurial podcast dedicated to getting you out of the car and into the money, with your host, lifelong entrepreneur and multimillionaire, Tom Antion.
[00:00:24] Hey, everybody, it's Tom here with Episode 199 of Screw the Commute podcast. Today, we're gonna talk about setting up an in-house video studio. Gonna have a lot of great information for you on that. And hope you didn't miss episode one hundred and ninety eight. That was Rob Garcia. This guy not only flunked out of high school, he flunked out of college, too. How do you do that? Well, you'll find out in this episode and also how he went on to get a PhD. Very inspiring. And coming up is episode two hundred. That's a big milestone for the show. We're going to have lots of great giveaways. Tell your friends you want to be there and listen to episode two hundred when it comes out, I believe, Wednesday. Our podcast app is in the app store. Make sure you grab a copy. You can do all kinds of cool stuff with it. And we have instructions for you on how to use it at screwthecommute.com/app. Now make sure you grab your copy of our e-book, How to Automate Your Business. And you if you've been listened to this park, as you know, this thing has saved me seven and a half million keystrokes. Just one tip in the book. Come on now, go get the darn thing and download it. We sell it for twenty seven bucks. You get it for free. And also while you're at the download page download our other thing, which is a white paper on doing quality podcast. People were charging four five and six thousand bucks for this and you get it free. So get over there to screwthecommute.com/automatefree. Now our special sponsor for this episode is the VIP video weekend where you have two full days of video training here in Virginia Beach. On day one, we shoot a bunch of videos of you in our high definition studio. Hey, I've just seen one of these videos go for between seven hundred and fifteen hundred bucks. And that's if you could find a studio locally who could do it now in Chicago, New York, Miami or L.A., you'd be looking at three thousand to six thousand bucks. You'd be rushed to get it done and you'd get no additional training or follow up. The last guy that was here got twenty five studio videos done, and I don't know how many he got done on the second day when we went out into the field. Then you get tutoring on cell phone apps that you can do outrageously good edits of your videos. Then you learn lighting. YouTube marketing with videos and social media marketing using video. So I'll take it. I'll tell you more about that in about the field training a little bit later and how you could attend for free. But if you want to check it out, it's screwthecommute.com/videoweekend. And of course it'll be in the show notes like everything for episode 199. So it's screwthecommute.com/199.
[00:03:43] Let's get to the main event. How to setup a home studio for shooting videos. Well, first, why would you want to do this? Well, I'll tell you why. It's a pain in the neck to get an idea for a video and then have to set all the stuff up for just that video. I guarantee you you won't do it. Also for traffic driving videos that are based on keywords. Over time, you'll need hundreds of short videos. It's the same thing. If you have this setup every time to do a couple of those videos, you won't do it. I'm telling you, you won't do it.
[00:04:19] Now, in this episode, you will absolutely want to visit the show notes. I'm going to give you a shout outs here to a bunch of people who have sent pictures and videos of their home studios and their range is very elaborate to downright as simple as you can get.
[00:04:37] All right. Here we go. Here's the shout outs, anyway. Brian Kelly has one of the most elaborate of everyone who submitted. And he provided us with a half hour video going over every part of his studio. Plus, what worked and what didn't. In a high noise and high heat environment, we've got other videos from Don Sturgell, Frank Candy. We'll have links to all their stuff, too. In the show, notes Greg Williams. He's the guy who just got his 25 studio videos done here. Most were traffic driving. A couple were welcome videos for his Web sites. And on the spot, we did a promo for his two latest books. You have veterans Rob Garcia and Steven Kuhn. He's a Bronze Star winner. Rob Hoerntlein, Stan the lie guy. He's part of my team on the Scam Brigade TV show. Tim Maudlin, Terry Suffredini. Barbara Cookson was here prior and she's got a nice video to show you what she was able to do. Jeff Rose And of course there'll be a bunch of my sets on there, too.
[00:05:47] All right, let's start out with backgrounds. We're gonna go from what's behind you and work forward towards the camera. Now, one thing I highly suggest you do is watch my YouTube videos call or a video called Lighting with cookies. And we'll have a link in the show notes, but you can just search for lighting with cookies. And then put my name Tom Antion because I'm not the only one with a video in this topic. Cookies are slang for cucoloris, and I don't remember how to spell it exactly, but you can make them yourself out of cardboard to make gorgeous patterns of light behind you. This cost a lot if you buy them from a video place. So my video shows you how to make them for virtually zero cost. Now watching this is highly recommended lighting with cookies, Tom Antion and YouTube. The one thing you don't want to do is have bright lights or windows or sliding doors behind you unless you have really thick curtains that knocked down most of the light. Having lots of light behind you makes your face go dark because the camera is trying to deal with the massive amount of light coming from the windows. So it's squints down the iris of the camera to deal with the large amounts of light and then the front of you goes dark. This is terrible. It's OK to have a little light hitting you in the back of your head and shoulders to set you apart from the background. Fact we do that on purpose, but not windows and giant sources of light. All right. Another thing you can do is simply set up in front of a blank wall. Now, if you're going to stand for your videos, don't stand too close to the wall. We call this the convict look. All right. Now, let me tell you a little story, how this came about back in the day there. There was a Apple commercial for Apple Mac products. They had a real cool guy who represented the Mac, and then they had a big fat guy like me that represented the P.C. and they were standing in front of a white background. It was very stark. And so people started trying to emulate that. But what they didn't realize, those two guys were standing probably forty five feet from that white wall, not right up next to it. All right. So don't stand right up next to a nice white wall. Now, blank walls can look gorgeous. If you use the technique from the lighting with cookies, YouTube video.
[00:08:22] All right. You can get backdrops. I've had giant rolls of photographic paper where it gets dirty from stepping all over it and tearing it. And then you just roll off a new piece. Now, these rolls of paper are opaque, which means no light shows through from behind. Showing light through from behind can be handy at times if you have a room or if you have the room to put a light behind the backdrop. We do have the rooms, so we quit using the photography roll paper and started using white muslin for our backdrop. Muslin is translucent, which means light will show through it. When you have the space showing lights through the muslin from behind can be beautiful. And it also gets the light fixtures out from the front of the backdrop where you're working. You can also put colored gels on the lights, lighting your background to really make it look beautiful and professional. And we have pictures of all this in the show notes under my section.
[00:09:32] Another possibility are photography backdrops that have patterns or pictures or cityscapes. There are literally hundreds, maybe even thousands of them you can look at and purchase right on Amazon. Just do a search for photo backdrops. They started about 30 bucks and go up. The hardest part is gonna be picking which one you want to use.
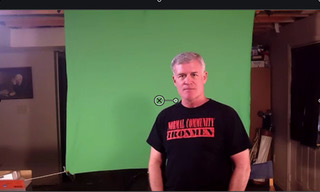
[00:09:56] Now we avoid green screen as the background to really do green screen correctly so it doesn't look stupid. Takes a higher degree of skill and equipment. First, you have to make sure the green screen is perfectly flat with absolutely no wrinkles. Sometimes people paint green on a flat wall or make sure there's no wrinkles. You can get green screen paint to do that, but still too much hassle. And who wants a big stupid green wall when they go to sell their house? You need to light the green screen separately, which means more lighting equipment because you also need to light yourself. So you got two sets of lighting equipment. Now you have to have enough space to get as far as you can from the green screen. If the green of the green screen bounces off the screen and gets on you. All your edges look fuzzy and terrible and stupid and low quality. All right. To me, it's just much more trouble than it's worth. And if you don't get a quality green screen that looks out of focus. See, one of the problems with green screen is if you're standing in front of the Taj Mahal or something. It's perfectly in focus and you're perfectly in focus. So it just looks like you're pasted on top of a picture of the Taj Mahal. Just stupid. Just avoided if you can.
[00:11:25] Now, bookcases can be interesting, just don't show your Kama Sutra for Dummies book. Yes, yes, there is such a book. I looked it up. I mean, people will stop your videos to try to see the titles on your bookcase. So make sure there's nothing on there that would send the wrong message about you or be offensive to anyone.
[00:11:47] You can get Pop-Up banners now if you got plenty of cash. That is because you can get those pop up banners in extra wide sizes. And I'm talking about the ones that retract into a metal case that's on the floor. Now, the extra wide sizes are really pricey. I mean, it could be three hundred dollars and end up way up from there. But you can do it and then you can switch them out easily. You can use wall hangings, pictures, diplomas and other credibility builders hanging on the wall behind you. I mean, just make sure if they are in frames with glass coverings that your certificates and such are are not causing glare off the glass and because you don't want that going into the camera lens. So do some experimenting to see how it looks and then tilt them one way or the other so that forward or backward so that they don't shine back into the camera. And another great tip for you is they go find, if you can, a used retail equipment store. I'm going to show you a little later. We have it in the show notes of a thing I got or lots of things that I got from retail equipment stores that make beautiful backdrops and just props for your whole setup.
[00:13:08] Here's another cool thing we did for one of our backgrounds. We made gorgeous pillars by using concrete forms, cylindrical concrete forms from Home Depot. We painted them black. I had bought some from one of these prom's supply stores and they were just garbage, little thin paper cardboard that was so flimsy they you blow on them, they'd fall over and they were very expensive. These cardboard forms are indestructible pretty much. And so for concrete. So they're they're much better and way cheaper. And you can just drive down to Home Depot and get get them. One thing I had. They aren't exactly precisely the same size. So you want to get a couple of them that match up. So if you stick them together, there's no ridge where they you put two pillars together or if you might want to make them taller.
[00:14:03] You can use flowers artificial is best so that let's say you have to reshoot part of your video and then edit it into the original later well those flowers you want to make sure they're not dead or some other flowers pop into your video for no reason at all. So artificial is best.
[00:14:23] Now, if you're going to stand up and use a whiteboard, make sure you tilt it to an angle where the shiny part, you know, whiteboards are usually those shiny on the front that doesn't glare into the camera lens.
[00:14:36] We also have a big monitor on a stand that can be used for you to stand up next to it and point to it. You'd need another way to either operate your computer on a stand or use a remote. And in case you can't picture what I'm talking about all I got a picture of the stand, the stand up monitor in the show notes.
[00:14:57] Ok, now let's move forward toward the camera. Are you planning on standing or sitting? Are you planning on standing and demonstrating something on a high table in front of you like a kitchen counter? In my case, I have a tiki bar, which was originally designed to be set up next to the pool. And of course, you'll see that in the show notes. And while I'm talking about the Tiki Bar, it came with two raised bar stools that we use all the time on our talking headset. And I brought the ice chest that matches the tiki bar, which we sometimes place a monitor on top of it. I mean, it can. It was quite a bargain to get all that as part of the deal. No matter what you're doing, you may have to adjust your lights, which we haven't gotten even to light yet, to to hit you at a higher level if you're standing up. Now, if you're sitting, will you be at a desk? Will the camera see below the desk and up your dress if you wear one or otherwise see unflattering things and maybe you need to place something in front of the desk like I did for the news set we built using an eight foot banquet table. Now nobody can see up my dress. I shouldn't tell you about that. So will you be on a chair or couch with nothing in front of you? So although this episode's not teaching you how to perform and look your best on video, you should keep in mind that you always want to lean forward towards the camera. Some couches and chairs are so soft you sink in deeply and then you lean back. That looks terrible on video. So if you plan on using such couches and chairs, maybe you want to rethink that or put a solid pillow behind your lower back to remind you and somewhat force you to sit forward. If you are appropriately standing or sitting far from the background, you want to do some test shots also to make sure your camera is not focusing on the backdrop instead of you.
[00:17:10] Let's talk about some other props. You can put end tables in the scene and I'll tell you a great place to get all kinds of cool stuff to place in your home studio. I mentioned early if you can locate a used retail equipment store, you can really find some awesome stuff to put in your studio, both as props and backgrounds and only a fraction of the retail cost. I got a stand up screen that most likely with clothes were hung all over in a retail store somewhere and without clothes hanging on it. It looks fantastic as part of my background and we'll have a picture of that in the show notes for you. I also got these big cubes. They're packed away. So they're just basically a giant cube like at least two and a half feet in all dimensions. And they're finished beautifully. And I'm sure they must've cost two to three hundred dollars each. I got both of them for 20 bucks because they took up a lot of room and a guy just want to get rid of them. Thrift shops and yard sales can also have some cool stuff, really dirt cheap. So keep your eye out, especially if you're gung ho enough to have multiple sets in your house, or maybe one indoor and one outdoor in the show notes. One guy even had an old TV antenna truss as his camera tripod and pseudo teleprompter outside.
[00:18:33] All right. I'm going to get in the lights next. But before I do that, I want to tell you more about the video weekend. I told you earlier about all the studio videos you could shoot. What I didn't tell you is that my people edit them, put on graphics and send you the finished videos after you get home. Then on day two, we go out in the fields at the park at various unique locations around Virginia Beach. We only offer the public video weekend once a year. But you can get together a group of four people. And guess what? You come for free. If you want to get a ton of videos like the guy I mentioned before, you can book a 1 on 1 2 day video event and will customize it just for you. As long as my people are available, we can book that anytime. You don't have to wait for. We had we do this once a year for the public in the fall and sell out all the time. Now with the one on one, you could end up with four times the number of videos you'd get doing the small group thing. So check it all out at screwthecommute.com/videoweekend.
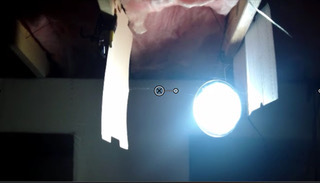
[00:19:43] All right. Let's talk about lighting now. As part of the video weekend, I do an entire course on video lighting. But for here, I just want to tell you a quick something that gets you started. You can buy inexpensive lighting kits on eBay for maybe 80 bucks that have three video lights. The stands and the balls. Now, for a home studio, these are plenty good enough. Now, they would not be good enough for a news crew that was slamming them around from location to location. But if they're just sitting in your house, they will hold up forever. You want to make sure there is a way to diffuse the light now diffused means sort of making it softer instead of harsh light like which you'd get off bright sunlight. Some of these kits may have a big box looking thing called a light box with a white translucent cloth on the front. Of course there's pictures of this in the show notes. This is the diffuser part of the light, which spreads out the light to cover more area and softens the light so it doesn't make harsh shadows. For most of you, a simple three light kit will be more than you'll ever need. Now, if you don't like the idea of light stands sitting in your living room, you can always get fancy and mount the lights in the ceiling. You just won't be able to adjust them as easily if you move your home studio set to another place. Now, if you buy used lights off eBay, don't get sucked into buying quartz. These kinds of lights are expensive, fragile and throw off enormous amounts of heat. When I say expensive to buy, the bulbs are expensive. You can get the fixtures cheap because nobody wants them any more. All right. What I learned on 35 years in Hollywood. That's all there was. And you can buy him for a song nowadays. But again, they're going to throw off a lot of heat. And if the bulbs go bad, they're very expensive. Video florescent and LED are better because they aren't as fragile. They don't use as much electricity and they don't throw off much heat. Almost no heat. Now, you're ceiling height will dictate what you can do with your lights. An above average ceiling height is better and more versatile. Older homes are around 8 feet high. Many newer homes have gone to 9 or maybe 10 feet. And in some cases, if you have vaulted ceilings, say, that are greater than 10 feet. You have enormous great flexibility. Here's what happens. Let's say you wanted to stand up to do your video and let's say you're six feet tall and your ceiling height is eight feet. And also, let's say you bought two foot large light boxes as your lights. So even if you let the light box almost touch the ceiling, the middle of the light is that about seven feet and you are six feet. So the lights almost hitting you horizontally in the face. The problem with horizontal lighting is that any reflections bounce back directly into the camera lens, which is bad. It's really bad if you wear glasses. Now, the higher the light is placed up to a point, the greater angle it hits you and the reflected light goes down towards the floor instead of back into the camera lens so you don't get glare on your video. So if you have higher than normal ceilings, that's a plus from the lighting point of view. Now, from the echo point of view for your audio. That would be a different story, which I'll address in a moment. Now, if you do have low ceilings, you might want to opt for very small L.E.D. lights. Some can be as small as four by four inches. That way you can get them up as high as possible. And many have diffusion filters you can put in front of the lights to get the soft look, which is more pleasing.
[00:23:36] Ok. Let's talk about sound a little bit. I mentioned a minute ago about echoes. The first thing is it's always going to be better sound wise if you have a clip on microphone or a shotgun microphone mounted just outside the visible part of the video. I like clip ons better for video because I can move more without the sound going up and down like it would if I moved out of the aim of the shotgun microphone. No matter what microphone you have, it will always be better sound wise if you have lots of sound absorbing things around where you're setting up. Many modern homes have tile, marble or stone floors instead of carpet. They got stark walls that have nothing on them. All these things cause sound to bounce around like crazy, which will cause for poor audio on your recording. So when possible, set up in a carpeted room. Or at least put that large throw rugs to absorb sound and consider cloth wall hangings to break up hard surfaces on the walls. Now your camera position, unless you have a fancy DSLR camera with interchangeable lenses, you want to get the camcorder or your cell phone as far back as practical without making the shot too wide where you're just a little spot in a big room. This gives you more flexibility to make nicer shots with your camera, which again is as too deep to go into here. But you will need a tripod. And if you're using your cell phone as a camera, you'll need a mobile phone adapter to hold your phone on the tripod. Another tip, if you're shooting with your cell phone, put it in the airplane mode so you don't get interrupted in the middle of a shooting video by a phone call.
[00:25:28] Now you can also get clip on lenses for cell phones, starting as little as 10, $15 and you go up to a couple hundred. This way it gives you more flexibility if you have a small room, but you need a wider shot. OK. So this is enough to get you started doing great video work at home. Make doubly sure you look at the show notes to see examples of all the things I talked about today and get on over to screwthecommute.com/videoweekend and get yourself booked for two days. That will just rock your world with great videos that we'll shoot for you and you'll learn how to do all this stuff with hands on. We'll show you how to do it. Help you, how to do it. We train you before you get here. We train you while you're here. And you got follow up with all of the crew around here. When you have questions, when you get home. So check all that out and then don't forget. Don't forget. People say don't use the negative. Remember episode two hundred is gonna have tons of great giveaways. So check it out. I think it's coming up in a couple days. So there you go. And I will see you on our super duper 200th episode. See ya later.
Join my distance learning school: https://www.IMTCVA.org
OR
Join the mentor program PLUS get a FREE Scholarship to the School: https://www.GreatInternetMarketingTraining.com