Menu
I’m here to give you some tips to save a ton of money by doing some of the simple editing yourself, and making you aware of some of the rules of video, you probably never heard of, that can mess up your final video. Also, make absolutely sure you listen to episode 088 on how to make a $50,000.00 video about you and your company for only pennies on the dollar.
Subscribe at:
![]()
![]()
NOTE: Complete transcript available at the bottom of the page.
Screw The Commute Podcast Show Notes Episode 103
![]()
Internet Marketing Training Center – https://imtcva.org/
Higher Education Webinar – https://screwthecommute.com/webinars
[04:21] Tom's introduction to Basic Video Editing [07:25] ALWAYS let the video run and shut up [08:47] Sitting off center [09:37] The 180 degree rule [12:33] Continuity errors [15:38] Screen direction [17:09] Cutaways and B-roll [19:00] Transitions [19:38] Basic editing [22:02] File formats [22:43] Grab your ASSets [28:55] Lighting with cookies [29:23] Framing [30:38] Cut on motion [31:31] Avoiding jump cuts [33:25] Sponsor message [34:40] Video editing softwareHigher Education Webinar – It's the second webinar on the page: https://screwthecommute.com/webinars
Screw The Commute – https://screwthecommute.com/
Screw The Commute Podcast App – https://screwthecommute.com/app/
Know a young person for our Youth Episode Series? Send an email to Tom! – orders@antion.com
Have a Roku box? Find Tom's Public Speaking Channel there! – https://channelstore.roku.com/details/267358/the-public-speaking-channel
How To Automate Your Business – https://screwthecommute.com/automatefree
VIP Video Weekend – https://www.antion.com/vipvideoday.htm
Great Internet Marketing Training – https://greatinternetmarketingtraining.com
Video Editing 101 – https://youtu.be/t7OHvkQtaME
Ken Burns Effect – https://youtu.be/n3DNZumaGNw
Lighting with cookies – https://youtu.be/5-UIidGYpyc
5 Basic Principles of Video Editing (Cut on Motion example at [2:37]) – https://youtu.be/yXcD4KVShO4
Internet Marketing Training Center – https://imtcva.org/
$50K Video for pennies – https://screwthecommute.com/88/
Nathalie Mullinix – https://screwthecommute.com/102/
Wendy Kurtz – https://screwthecommute.com/104/
I discovered a great new headline / subject line / subheading generator that will actually analyze which headlines and subject lines are best for your market. I negotiated a deal with the developer of this revolutionary and inexpensive software. Oh, and it's good on Mac and PC. Go here: http://jvz1.com/c/41743/183906
The WordPress Ecourse. Learn how to Make World Class Websites for $20 or less. https://www.GreatInternetMarketing.com/wordpressecourse

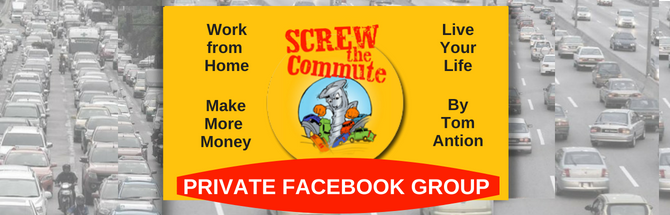
Join our Private Facebook Group! One week trial for only a buck and then $37 a month, or save a ton with one payment of $297 for a year. Click the image to see all the details and sign up or go to https://www.greatinternetmarketing.com/screwthecommute/
After you sign up, check your email for instructions on getting in the group.
![]()
![]()
Want The Transcript for this episode?
Episode 103 Basic Video Editing
I’ll get you familiar with the terms and alert you to some things about video I guarantee you’ve never even heard of.
Last Episode. 102 Nathalie Mullinex she’s one of the most successful realtors in the country and when no one can make the deal she can.
I’ve got a big Freebie to thank you for listening to this podcast. It’s my $27.00 e-book “How to Automate Your business” Just one of the tips in this e-book has saved me over 7 million keystrokes. And I just might have something else for you over there I’ll know you’ll like. Visit: https://www.ScrewTheCommute.com/automatefree
Our Podcast App. Is in the iTunes store. You can also go to https://www.ScrewTheCommute.com/app where we have complete instructions to show you how to use all the fancy features so you can take us with you on the road and put it on your cell phone and tablet.
If you would be so kind, please visit iTunes and leave us a review and rating. It really helps out the show.
Our youth program is in full swing. We’re looking for young people that are doing entrepreneurial things. When I say young, that’s up to the early twenties. If they’re older than that, they might be a candidate for our regular podcast. If you know anyone, they can get in touch with me at orders@antion.com to see how to apply to be featured on an episode of Screw the Commute special youth edition.
Our on-demand TV channel is up on both Roku TV and Amazon Fire The first channel is “The Public Speaking Channel” We have several others coming. Brutal Self Defense, Protection Dogs Elite and various Internet Marketing Channels. If you have a Roku device or an Amazon Fire Stick, it’s a really good deal. You can get thousands of channels and you can hook up your Netflix and other favorite channels through the same device. I’ve got about $100,000.00 worth of free training on the channel. Just search for ‘the public speaking channel”
Sponsor
OK. Our sponsor is the VIP Video Weekend where you have two full days of video training. On day one we shoot a bunch of videos of you in our high def studio. Then you get tutoring on cell phone apps that can do outrageously good edits of your videos. Then you learn lighting, YouTube Marketing and Social Media Marketing using video. Then on Day two we go out in the field where I teach you how to make a marketing video on location no matter where you are. At the beach, at the park and at various unique locations around Virginia Beach. We only do this once or twice a year, but you can get together a group of 4 or 5 people (max) and we’ll do a custom weekend for you.
The link to check it out will be in the show notes.
Main Event
Basic Video Editing
So, I don’t need to rah rah the value of video in this episode. I’m assuming you know how important it is to your business. I’m here today to give you some tips to save a ton of money by doing some of the simple editing yourself and making you aware of some of the rules of video, you probably never heard of, that can mess up your final video. Also, make absolutely sure you listen to episode 088 on how to make a $50,000.00 video about you and your company for only pennies on the dollar. There are massive money saving and creative tips in that episode and just so I can brag a little bit. The video I made using the exact method I outlined on that episode has made me way over 6 million dollars. LOL I guess I’m the 6 million dollar ad….at least from that video anyway.
The first thing I want to tell you is that I used to be against any video editing unless you are a video editor. The reason was is that the software is too complicated and even if you learned how to use the software your videos might still stink because besides the technical aspects to getting to a finished video, it might still suck because there is an art to it also. Most people would never pursue this deep enough to meld the technical aspects with the art so they would still end up with crappy videos after putting in lots of work.
Because of the many software programs and apps out now designed to make things much easier for you to learn the basics, I’ve changed my mind a little on this. In this episode I’m going to tell you some of the skills you want to learn if you want to churn out pretty darn good video without hiring editors all the time. I won’t be talking about how to operate specific software and apps because it would pretty much be impossible to tutor you on audio of how to do video. There are tons of YouTube tutorials on pretty much every software you might consider and most have their own training too.
One thing you can do to make the actual editing easier is to make sure you do the best you can getting your video shot. I don’t care if it’s off your smart phone or tablet or if you have a $5000.00 professional camera or DSLR (That’s a camera that looks like a basic 35mm camera, but actually shoots high quality video.) There are things you can do to make your life easier when it comes to putting videos together into a final production.
One really important thing you can do ALWAYS is to let the video run before anyone starts talking for at least a couple seconds. Also, AND THIS IS A BIG POINT, when you’re done talking or if you think you messed up JUST SHUT THE HECK UP but let the recording go for a few seconds. If you leave room at the beginning and especially the end of segments you can fix many screwups in editing.
If you think something came out wrong and you immediately scream, “Oh Shucks!” you have just ruined any chance of fixing things in editing because there’s no silence to work some editing tricks. It’s you screaming Oh Shucks and you are just making things harder on yourself later. So, make sure you shut up, smile and look at the camera or whomever you are talking to in the video. This is really important to leave that blank space at the end.
Sit Off Center
If you are talking to the camera, we call that you’re being a “Talking Head”. No matter how exciting you think your topic is, it can always be enhanced with some graphics. If you sit right in the middle of the picture, it’s hard to fit a graphic in between your head and the side of the screen. I messed this up a lot in the beginning of my career. Now, I sit off to the side ….. it doesn’t really matter which side as long as you stay on the same side in the same video …..we’ll be talking about something called a continuity error shortly and different rules where if you break them, you confuse the viewer. Anyway, sit off to the side so you can pop in graphics. Here’s one of the rules right here:
180 Degree Rule
Another rule you don’t want to violate is called the 180-degree rule. Before we go on let me mention that, yes, I know this is an audio podcast. So, in the show notes for this episode, I’ve put links to YouTube videos that do a really good job of illustrating some of the things I’m talking about here. The 180-degree rule is one of them. So, what is it?
You probably have seen many interviews on TV where two people are either seated facing each other or standing and facing each other. If it’s a really important person being interviewed, there are probably at least three cameras going. One camera is in the middle shooting both people from the side. Let’s call the them the person on the Left and the person on the right. Another camera would be shooting over the should of the person on the right and looking into the face of the person on the left. Another camera would be shooting just opposite. It would be shooting over the shoulder of the person on the left into the face of the person on the right. I guarantee you’ve seen this hundreds of times on TV.
What I want you to pay attention to is that all the cameras are on the same side of an imaginary line drawn between the person on the left and the person on the right. If one of those cameras crossed over that imaginary line and goes on the opposite side of either person, everything goes to heck. It makes it very confusing to the viewer to know what’s going on. Things just don’t look right. Now if all the cameras were on the other side of the imaginary line for the entire shoot, everything is fine. It’s when one of them goes rogue LOL and crosses the line when you have trouble. So, if you are involved in either being interviewed or interviewing someone else, make sure all cameras stay on one side of that imaginary line. If you only have one camera shooting both of you, you don’t have to worry about this unless someone shooting you with your cell phone decides to get creative and cross to the other side of you, now the final production is going to look goofy. Pay attention to the 180-degree rule.
You can see examples on YouTube and remember the 180-degree rule usually applies with dialog between two people. I have several links in the show notes so you can go later and see examples.
https://youtu.be/t7OHvkQtaME
Continuity Errors
The next thing you want to watch out for is continuity errors. Now, remember we’re talking about things that if they get shot correctly don’t give you nightmares when it comes to editing the scenes together. What you want to watch out for if you’re shooting a lot and taking breaks between shots is known in the industry as “continuity errors.” Hollywood films hire people to watch for any differences in the scene that are edited together and look weird and they still make mistakes. You can see tons of these as bloopers and film mistakes on YouTube.
The classic example would be something like you are in the scene talking to the camera and there is a glass of ice water sitting on your desk. You decide to take a break for lunch and when you start shooting again, the ice is melted because right after you finished the first segment, you drank a bunch of the water. When you pick back up the shooting after lunch the glass has no ice in it and is at a different level. Also, maybe you rolled your sleeves up after lunch and they were not rolled up before lunch. The people watching the continuous video have no idea you broke for lunch. They didn’t see you drink the water and they didn’t see your sleeves get rolled up, but all of a sudden to the viewer your drink magically evaporated and ghosts or the invisible man must have rolled your sleeves up. These are continuity errors and can ruin your chances of editing the segments together without things looking a little goofy to the viewer.
Potential continuity errors are why you might want to plan your videos shorter so you can knock each one of them out in one sitting. You will virtually eliminate the chance of these errors if you do this. Then when lunch time comes along, you can say on the video, “I’m going to take a short break and when I come back, I’m going to talk about XYZ.” That way, the audience knows you took a break and if things are different when you come back, it makes sense. You took a break, you drank your water and you rolled up your sleeves. They didn’t see any of this, but telling them you’re taking a short break is the excuse for all these things to change. Maybe you have a white board in your office and when you come back from the break it has an entirely new training segment. But if suddenly with no break and no explanation the whiteboard content instantly changed, everything would look weird and instead of listening to you, the viewer’s minds would be on the fact something weird is going on. So, watch for continuity errors.
Screen Direction
Let’s talk about screen direction or which way the viewer sees you moving across the screen. Now this is a subtle nuance. Generally, if the viewer sees you walking from left to right, they interpret that as you are moving forward. If you are moving right to left, that’s interpreted as moving backward. Neither is wrong but you don’t really want to mix them in the same sequence i.e. you are moving one direction and then instantly moving the other direction. You can see an example of this in the videos I’ve put in the show notes for you. If you get stuck with some shots like this it’s possible you can fix them by using the function of video editing software called “Flip Horizontally”. I.e. if you’re walking right to left you can change that piece of video to look like you are walking the opposite direction before you edit it in to the final video. You can’t do this if there are obvious things that if flipped would look stupid like a big sign behind you which now has the letters backwards. OK. That’s a little about screen direction.
Cutaways / B-Roll
One of the things that has saved every video editor on earth are cutaways AKA B-roll. These are other related video shots that can be inserted while the audio or dialogue is still being heard. For instance, let’s say you have a shot of someone walking over to pick up a glass of water off a counter. As they get near the counter and start to reach for the glass you cut to a closeup of their hand grabbing the glass.
Having lots of these shots available will save your butt when something has gone wrong in the main shot that you can’t fix. Instead of trying to doctor up a bad shot, you simply cut to the cutaway / B-roll and then cut back to the main shot after the bad part has passed. The viewer then would have no idea anything was wrong with the main shot. (Will talk about this later in the section about “Jump cuts”.)
Another thing cutaways do even when there is no glitch in the main shot is to further explain what the person is talking about. You see this extensively in my production about my retreat center. You can see it at https://www.GreatInternetMarketingTraining.com and click on the little TV monitor. I’m sitting in front of the fireplace talking and the editor would cut to pictures of what I was talking about. If I was talking about our pool and tennis court, you would hear me in what’s called voiceover, but you would be seeing the pool and the tennis court. So those are cutaways/b-roll and they’re really important to you.
Transitions – are where two different scenes come together or when one scene moves forward or backward in time. There are many types of transitions. The most common one is a “cut”. That’s where you are looking at one scene and then immediately you are looking at another scene. A dissolve is where the two scenes overlap and one fades out while the other fades in. There are all kinds of fancy transitions, like wipes and flips, but the most used are cuts and dissolves.
Ok Basics of Editing
A term you will hear often and must understand is the “Time Line” This is usually across the bottom of any kind of video editing software that tells you where you are in the video as a function of time. It starts at zero and goes up by video frames, seconds, minutes and hours.
The “Playhead” is a vertical line that tells you where you are in the video and it moves.
How you do certain things in video editing depends on what software you’re using …..I’ll tell you what I use, but there are lots out there to pick from and you’d have to get tutorials on how to use them because they all are different. I will be telling you here some things that are common in all video editing and things you should learn how to do.
Some video software like many cell phone apps will have the video already there with a timeline at the bottom as soon as you shoot and try to edit the video.
Some software you import the video and then you drag it to the timeline.
Maybe I shouldn’t say “Import the video” most likely you will see a command in the software, to import the “media”. They call it “media” because it may not be video. Some of it’s going to be video, but it might be still photographs, charts, graphs and music or other audio like a script your read and recorded to put in the video.
Things you need to know how to do:
Now I’m going to tell you some things you need to know how to do. I learned them one at a time mostly from YouTube tutorials whenever I ran into a situation where I needed them. If you want to just start out easy with a simple video where you’re talking to the camera things will be pretty easy. I do suggest you recruit a young person to tutor you when little things come up that they’ll figure out in 2 seconds and it might take you 2 months to figure it out. Hey, I’ve been there. LOL
File Formats
First thing you need to know about is file formats. Here’s pretty much all you need to know. You’ll mostly be dealing with .mov files and .mp4 files. At the time of this recording you are pretty much exclusively want you project to end up as .mp4. That’s the standard nowadays. Remember this is just a basic discussion. Just remember you want .mp4 This doesn’t mean you can’t combine different formats when you’re working on your video. You just want to end up with the final video when it’s all put together being .mp4
Grab your assets
So, the first thing you do is gather all the stuff you want in your final video. These are called media or maybe assets. Video clips, photographs, graphs, audio and all that stuff. Then you import them into your software program. You will usually be calling your video project, “a project”. Look how creative that is LOL So, basically, you’re grabbing all the stuff that’s going into your video. Don’t worry if you grab too much or more than you need. Just because it’s in your project, doesn’t mean you have to use it. And vice versa. If there’s something that’s not in there, you can go get the file or make one and import it anytime.
Then you start dragging your video clips onto the timeline. To keep things easy, just put the first scene first and then drag the next scene and put it on the timeline to the right of the first scene and add each additional scene to the right. Most likely when you drag a scene slowly to the left, it will butt up against the previous scene. That line where the two meet is called a “Cut” or “transition”. A “Cut” is a certain kind of “transition”.
Here’s a Basic List of Skills
Now let’s get into some of the simple things you must learn how to do in whatever editing program you choose and yes, I’ll name a couple before we’re done.
• Trim Beginnings and Endings of Clips…so that’s just cutting off video that’s not part of the final production.
• Do a transition between clips….you could do a dissolve or a fade or a straight cut and I would avoid all the fancy transitions for now. Just keep it simple.
• Split a scene into smaller parts so you can insert other assets at that point. So you’re cutting a scene up so you can put something in the middle of it.
• Put text over your video
• Put text over a colored background almost like a PowerPoint slide or title slide.
• Put in a still Photo. In this case the photo takes over the entire screen.
• Put picture in picture AKA PIP where you either put another video playing in a small part of your original video or you put a still picture in your video. In this case the picture is not taking up the entire screen. It’s why I sit off to the side now so I have room to put my picture or book cover or things on the same screen with me.
• Ken Burns Effect – While we’re talking about still photos this would be a good time to talk about the Ken Burns Effect. This is where you have a still photo on the screen and the camera appears to be moving. The camera is not actually moving the editing software just makes it look like it’s moving. It’s a great effect. https://youtu.be/n3DNZumaGNw
• Turn audio up or down
• Blur something out so it can’t be seen
• Add royalty free Music if appropriate. Check with Mike Stewart the internet Audio and Video Guy. Another source of royalty free music is musicbakery.com I don’t mean you don’t have to pay for the music. I mean you won’t get sued for copyright infringement by purchasing the rights to use the music from these sources. Remember to read the terms of service.
• Group and Ripple- Grouping is combining a bunch of edits together so they don’t move and get ruined as you continue editing. Also, let’s say you edited your entire video and you forgot to put a title slide at the beginning. You try to slide your edited video to the right to make room for the title slide on the timeline and all your edits go crazy and get misaligned. You needed to group everything together so it’s like all glued together. Another similar function is “Ripple Editing” which keeps things synchronized when moving stuff around.
• And finally Render - In video production rendering means you are combining all the edits, music, photos, transitions speech and whatever other things you did to the video and make the final production. Remember, it’s going to be .mp4
OK. So, if you can do all those things, you da bomb on simple video editing. You don’t need to be able to do them all to get started though. So, don’t worry about that.
Now let me give you a few extra tips to do and things not to do in your videos.
Lighting with cookies https://youtu.be/5-UIidGYpyc This isn’t really an editing tip, but it’s a cool lighting tip to make gorgeous backgrounds on walls and bookcases and such for only pennies. I’ll put the link to my YouTube video about it in the show notes.
Framing When people that don’t know you are watching your video you don’t want to be framed with your head filling the screen like in an extreme closeup. That’s way to intrusive. You should be framed with lots of area around you. If the video is a little longer, you can tighten the framing to be more intimate as people get to know you better, i.e. like they are now inviting you in to their living room. A perfect example of this is in my Mentor program and joint venture video that you can see at https://www.GreatInternetMarketingTraining.com Most of the time I’m sitting in front of the fireplace. If you pay attention, you will see that in the beginning of the video, there is plenty of my fireplace room around me to be seen. As you go through the video the framing on me gets tighter and tighter as you get to know me. That tight framing would be inappropriate in the beginning of the video.
All of the framing was done…and this might surprise you…. in editing. I never moved and the camera never moved. Electronically in editing it looks like the camera was zoomed in further, but it really wasn’t.
And my last tip on things you should do is to “Cut on motion” either in the same scene or from one scene to the other. Deciding when to make cuts is an artform in itself. My friend and Emmy nominated Hollywood editor Gary Smith would agonize for hours over a tenth of a second cut. You don’t have to be that precise, but one tip is to cut while there is motion on the screen. In the show notes I’ve provided a link to a video where at about the 3-minute mark it shows examples of cuts on motion. It also has jump cuts and some other things on it worth watching.
https://youtu.be/yXcD4KVShO4 At about 3 minutes cut on motion example
Now let me give you one really important thing NOT TO DO.
Jump cuts that aren’t on purpose – A jump cut is when there is not enough difference in the sequence from one shot to the next. It looks like someone just twitched real fast. Unless done skillfully and on purpose, they look like and are mistakes and will make the production look poor quality. They can also be very jarring to the viewer.
To avoid jump cuts make sure whatever scene you cut to is at least 30 – 45 degrees different from whatever camera angle scene you had before the cut. Another way is to do electronic zooms and just as an aside most good videographers don’t zoom much, but it’s ok to do it in editing if you know what you’re doing and the look you’re going for.
Now let’s get back to something I mentioned way earlier. Cutaways and b-roll. You couldn’t possibly calculate how many productions and editing problems have been fixed by simply cutting to something else wherever the jump cut was and cutting back to the main scene after the jump cut. I.e. instead of trying to hobble together a pitiful fix for a bad piece of footage or a glitch in the recording or an accidental jump cut, you simply take the viewer away to another picture and bring them back after the problem. So, make sure you have plenty of cutaways and b-roll handy so they’re there when you need them.
OK. So, there you have it. A plan to get you started doing simple video editing that will save you a ton of time and money once you get the hang of it. Before I get in to some of the software and apps let me tell you about…
The VIP Video Weekend where you have two full days of video training. On day one we shoot a bunch of videos of you in our high def studio. We put the graphics on. We edit it give you the finished product. Some people charge you $700.00 to $1,000.00 for just one video. We’ve had people here at VIP video day who came prepared and did 12 or 13 videos. Then you get tutoring on cell phone apps that can do outrageously good edits of your videos. Then you learn lighting, YouTube Marketing and Social Media Marketing using video. Then on Day two we go out in the field where I teach you how to make a marketing video on location no matter where you are. At the beach, at the park and at various unique locations around Virginia Beach. We only do this once or twice a year, but you can get together a group of 4 or 5 people (max) and we’ll do a custom weekend for you.
The link to check it out will be in the show notes.
Software
I happen to use Magix Vegas software. It used to be Sony Vegas, but they got bought out. You can use iMovie which comes on a Mac. I don’t suggest trying to use the serious editing programs like Final Cut Pro or the full version of Adobe Premiere. The learning curve would be far, far more than mere mortals should want to tackle.
On the cell phone you can do lots of great things now, but having such a small screen, means things will be tougher to do, just because things are so small.
Vidlabs
Splice
Adobe Premiere Clip is an easy to use cell phone version of its big sister and certainly a good choice for novices.
OK That’s it. Go out and make some movies and go get your FREE Automate Your business book and another surprise I have for you at https://www.ScrewTheCommute.com/automatefree
Please, please, please subscribe and the show a review at iTunes.
Next episode 104 The fantastic Wendy Kurtz She has been billed “the Empress of PR” by Mark Victor Hansen, co-creator of the Chicken Soup for the Soul publishing empire
I’ll catch ya on that episode.
Join my distance learning school: https://www.IMTCVA.org
OR
Join the mentor program PLUS get a FREE Scholarship to the School: https://www.GreatInternetMarketingTraining.com